In Socialbud, you can schedule and edit your posts from the Calendar. This article will guide you through the main features of the Calendar, including post types and how to edit posts directly within the Calendar.
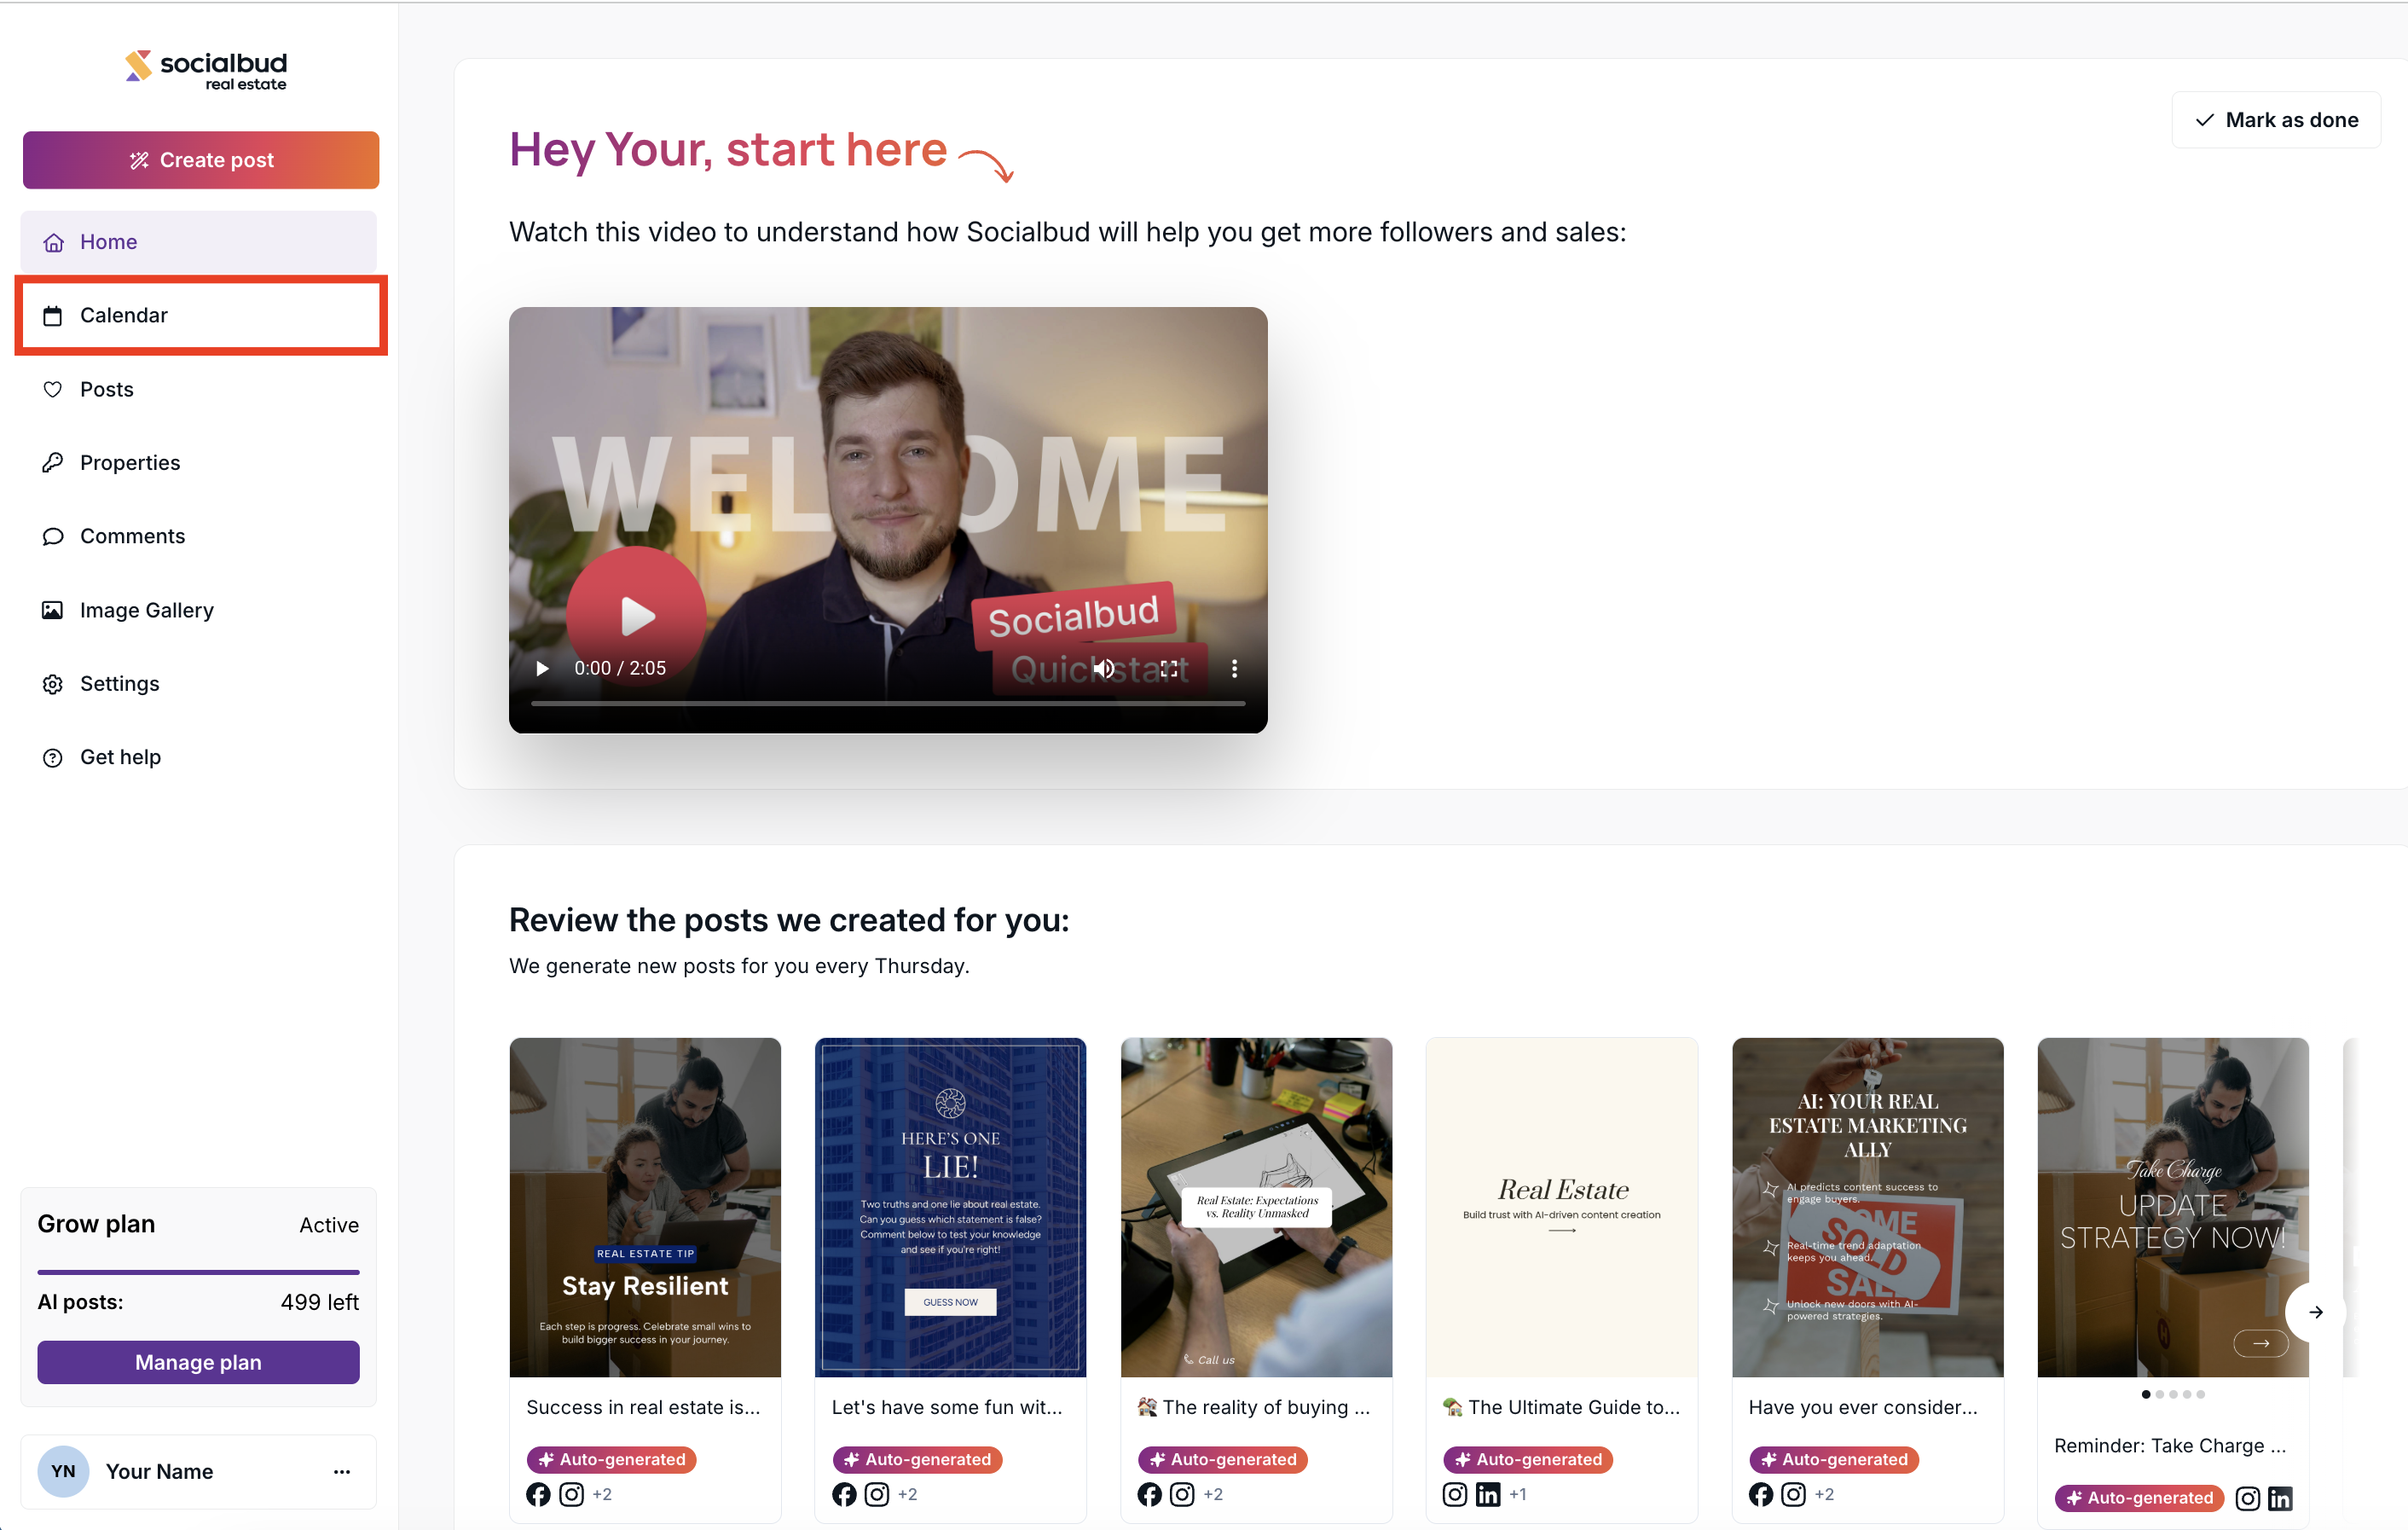
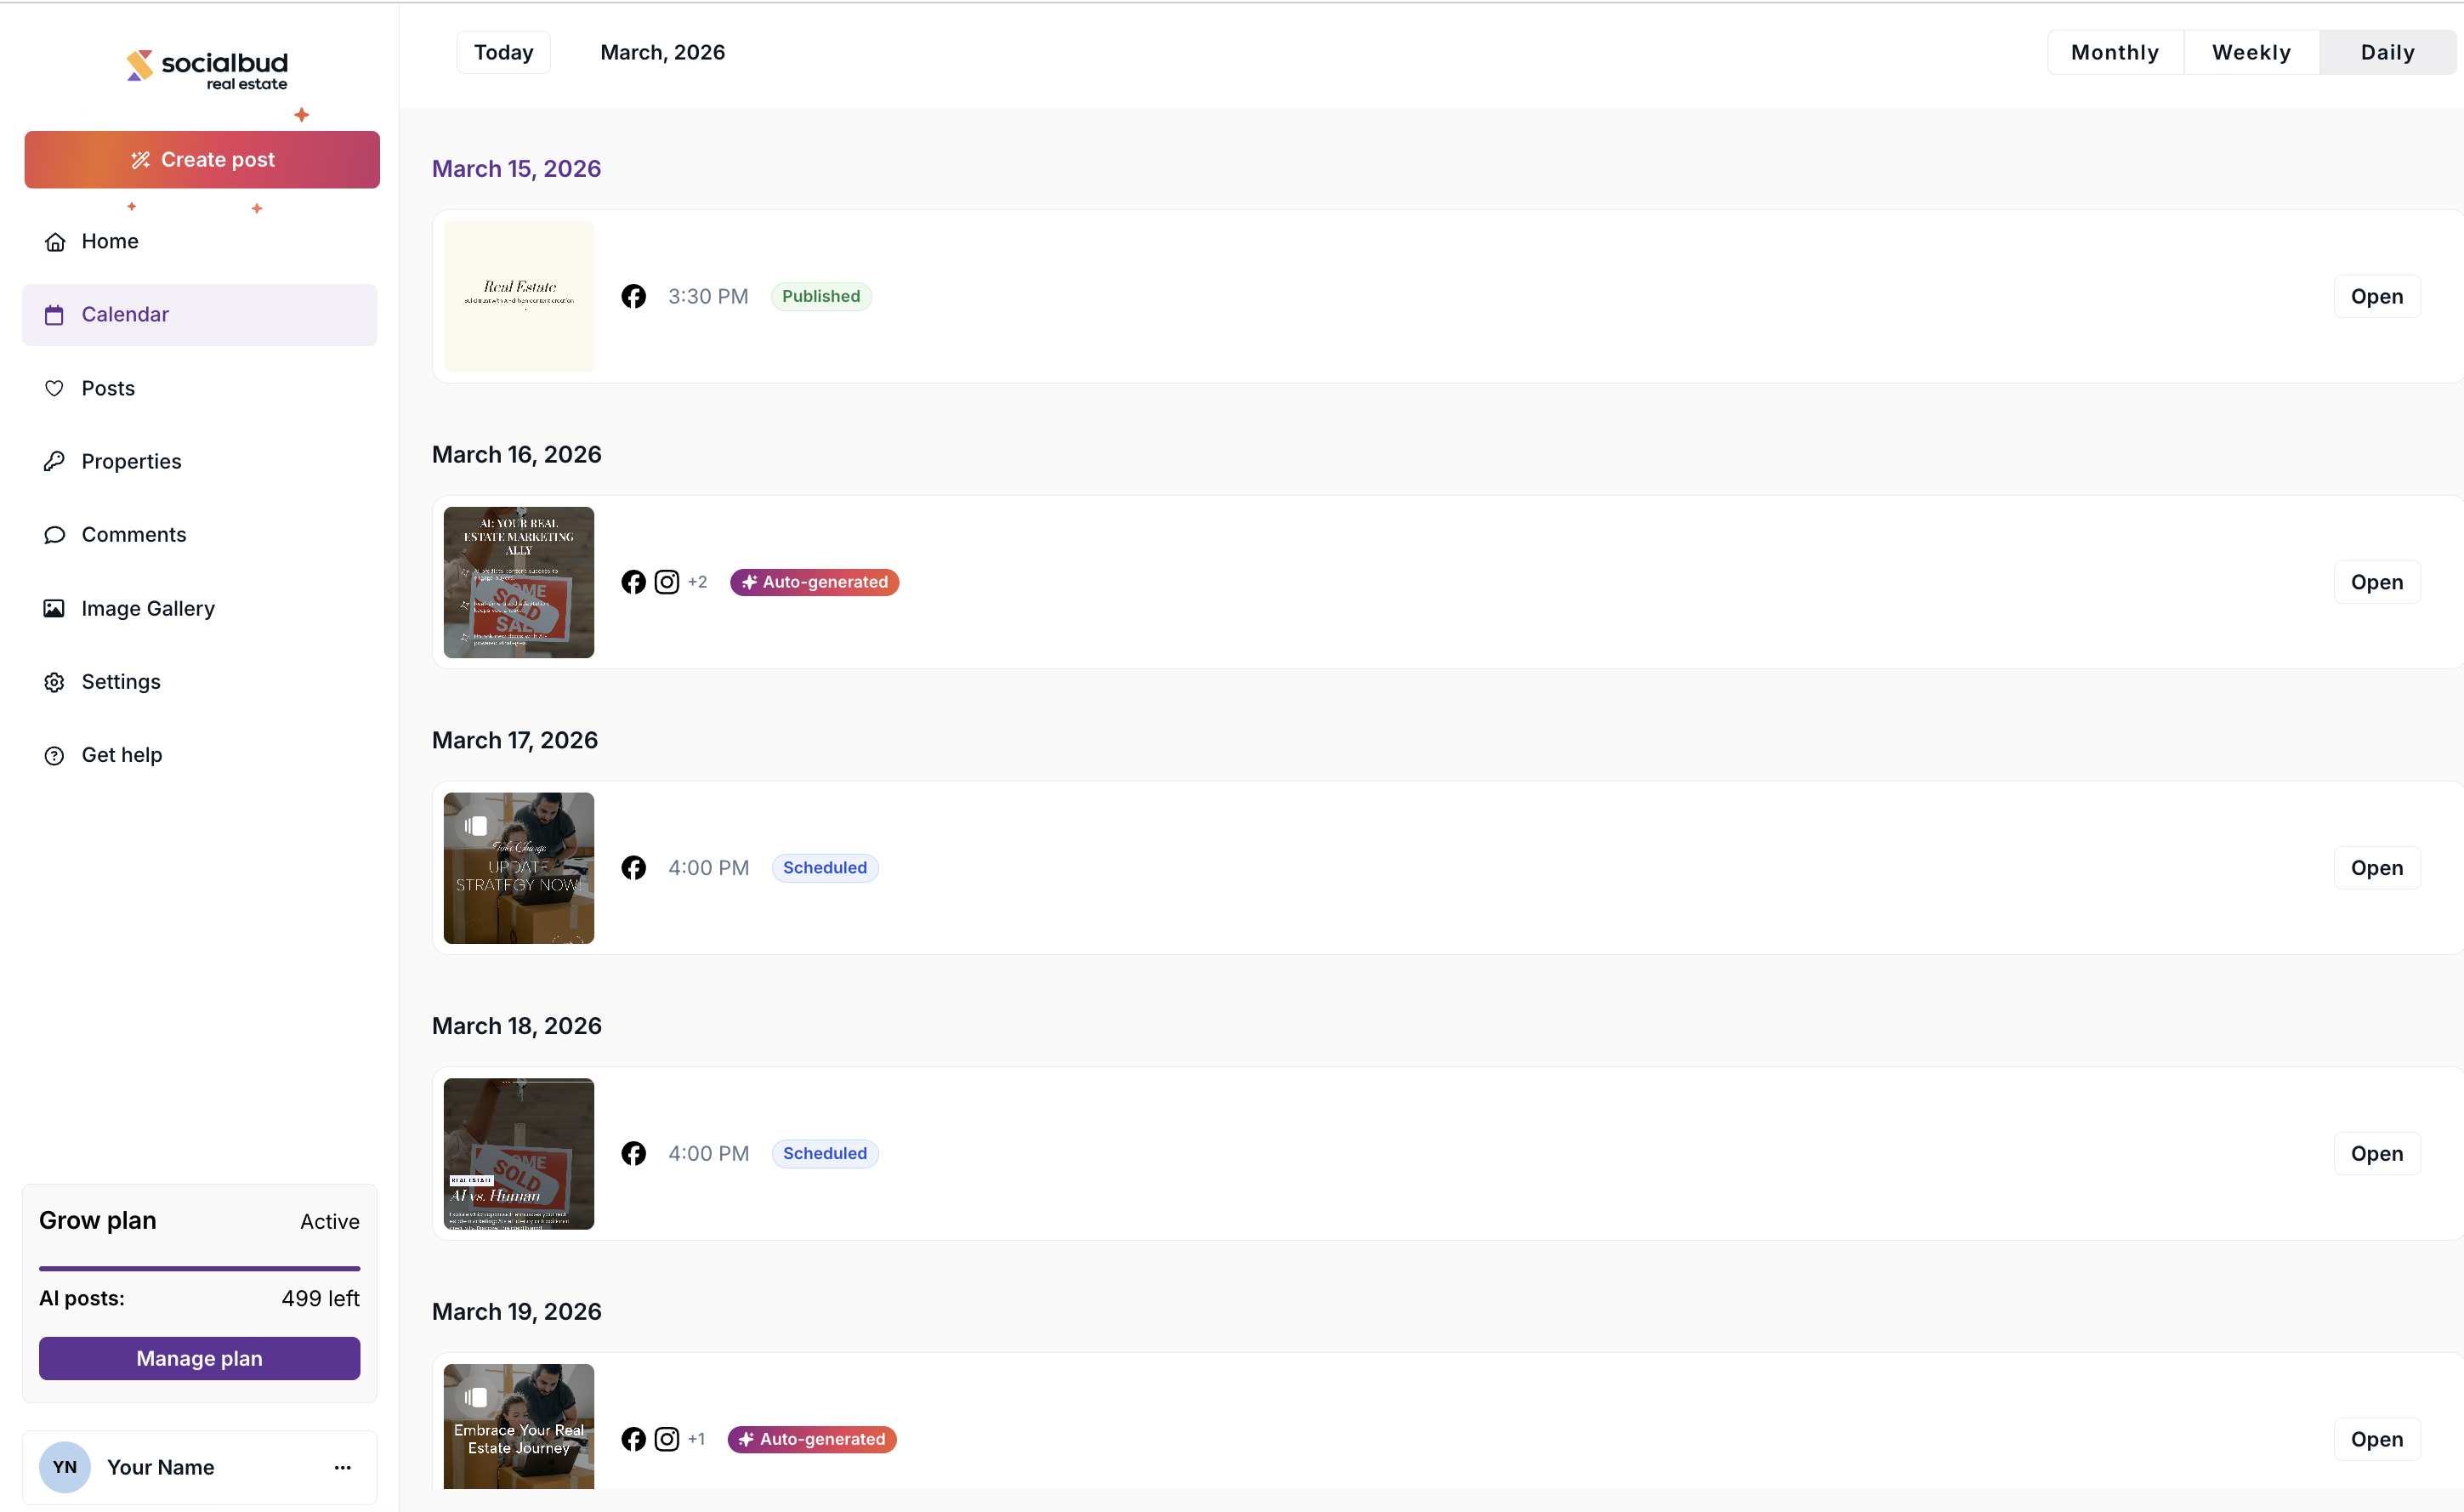
The Calendar in Socialbud provides a comprehensive view of your posts, including those that are scheduled, published, or awaiting review. To access the Calendar, click on the "Calendar" element in the left navigation bar.
The Calendar view consists of two main sections:
Toolbar features: Located at the top of the page.
Calendar Features: Located at the bottom of the page.
The toolbar at the top of the Calendar page allows you to navigate dates and customize your view:
Today button: Quickly jumps to the current date.
Navigation arrows: Switch between months, weeks, or days.
Month and year selector: Click to choose a specific date.
View selector: Located in the top-right corner, this lets you switch between monthly, weekly, or daily views. The default view is weekly.
The Calendar displays all posts for the visible date range, including posts you create or those generated by our AI.
Views
There are three type of views in the calendar:
Monthly
Weekly
Daily
Each view shows your scheduled, published, failed, and auto-generated posts in a different layout.
You can access your posts directly from the Calendar in several ways. The calendar helps you review, edit, schedule, or delete posts that were created for you automatically or added manually.
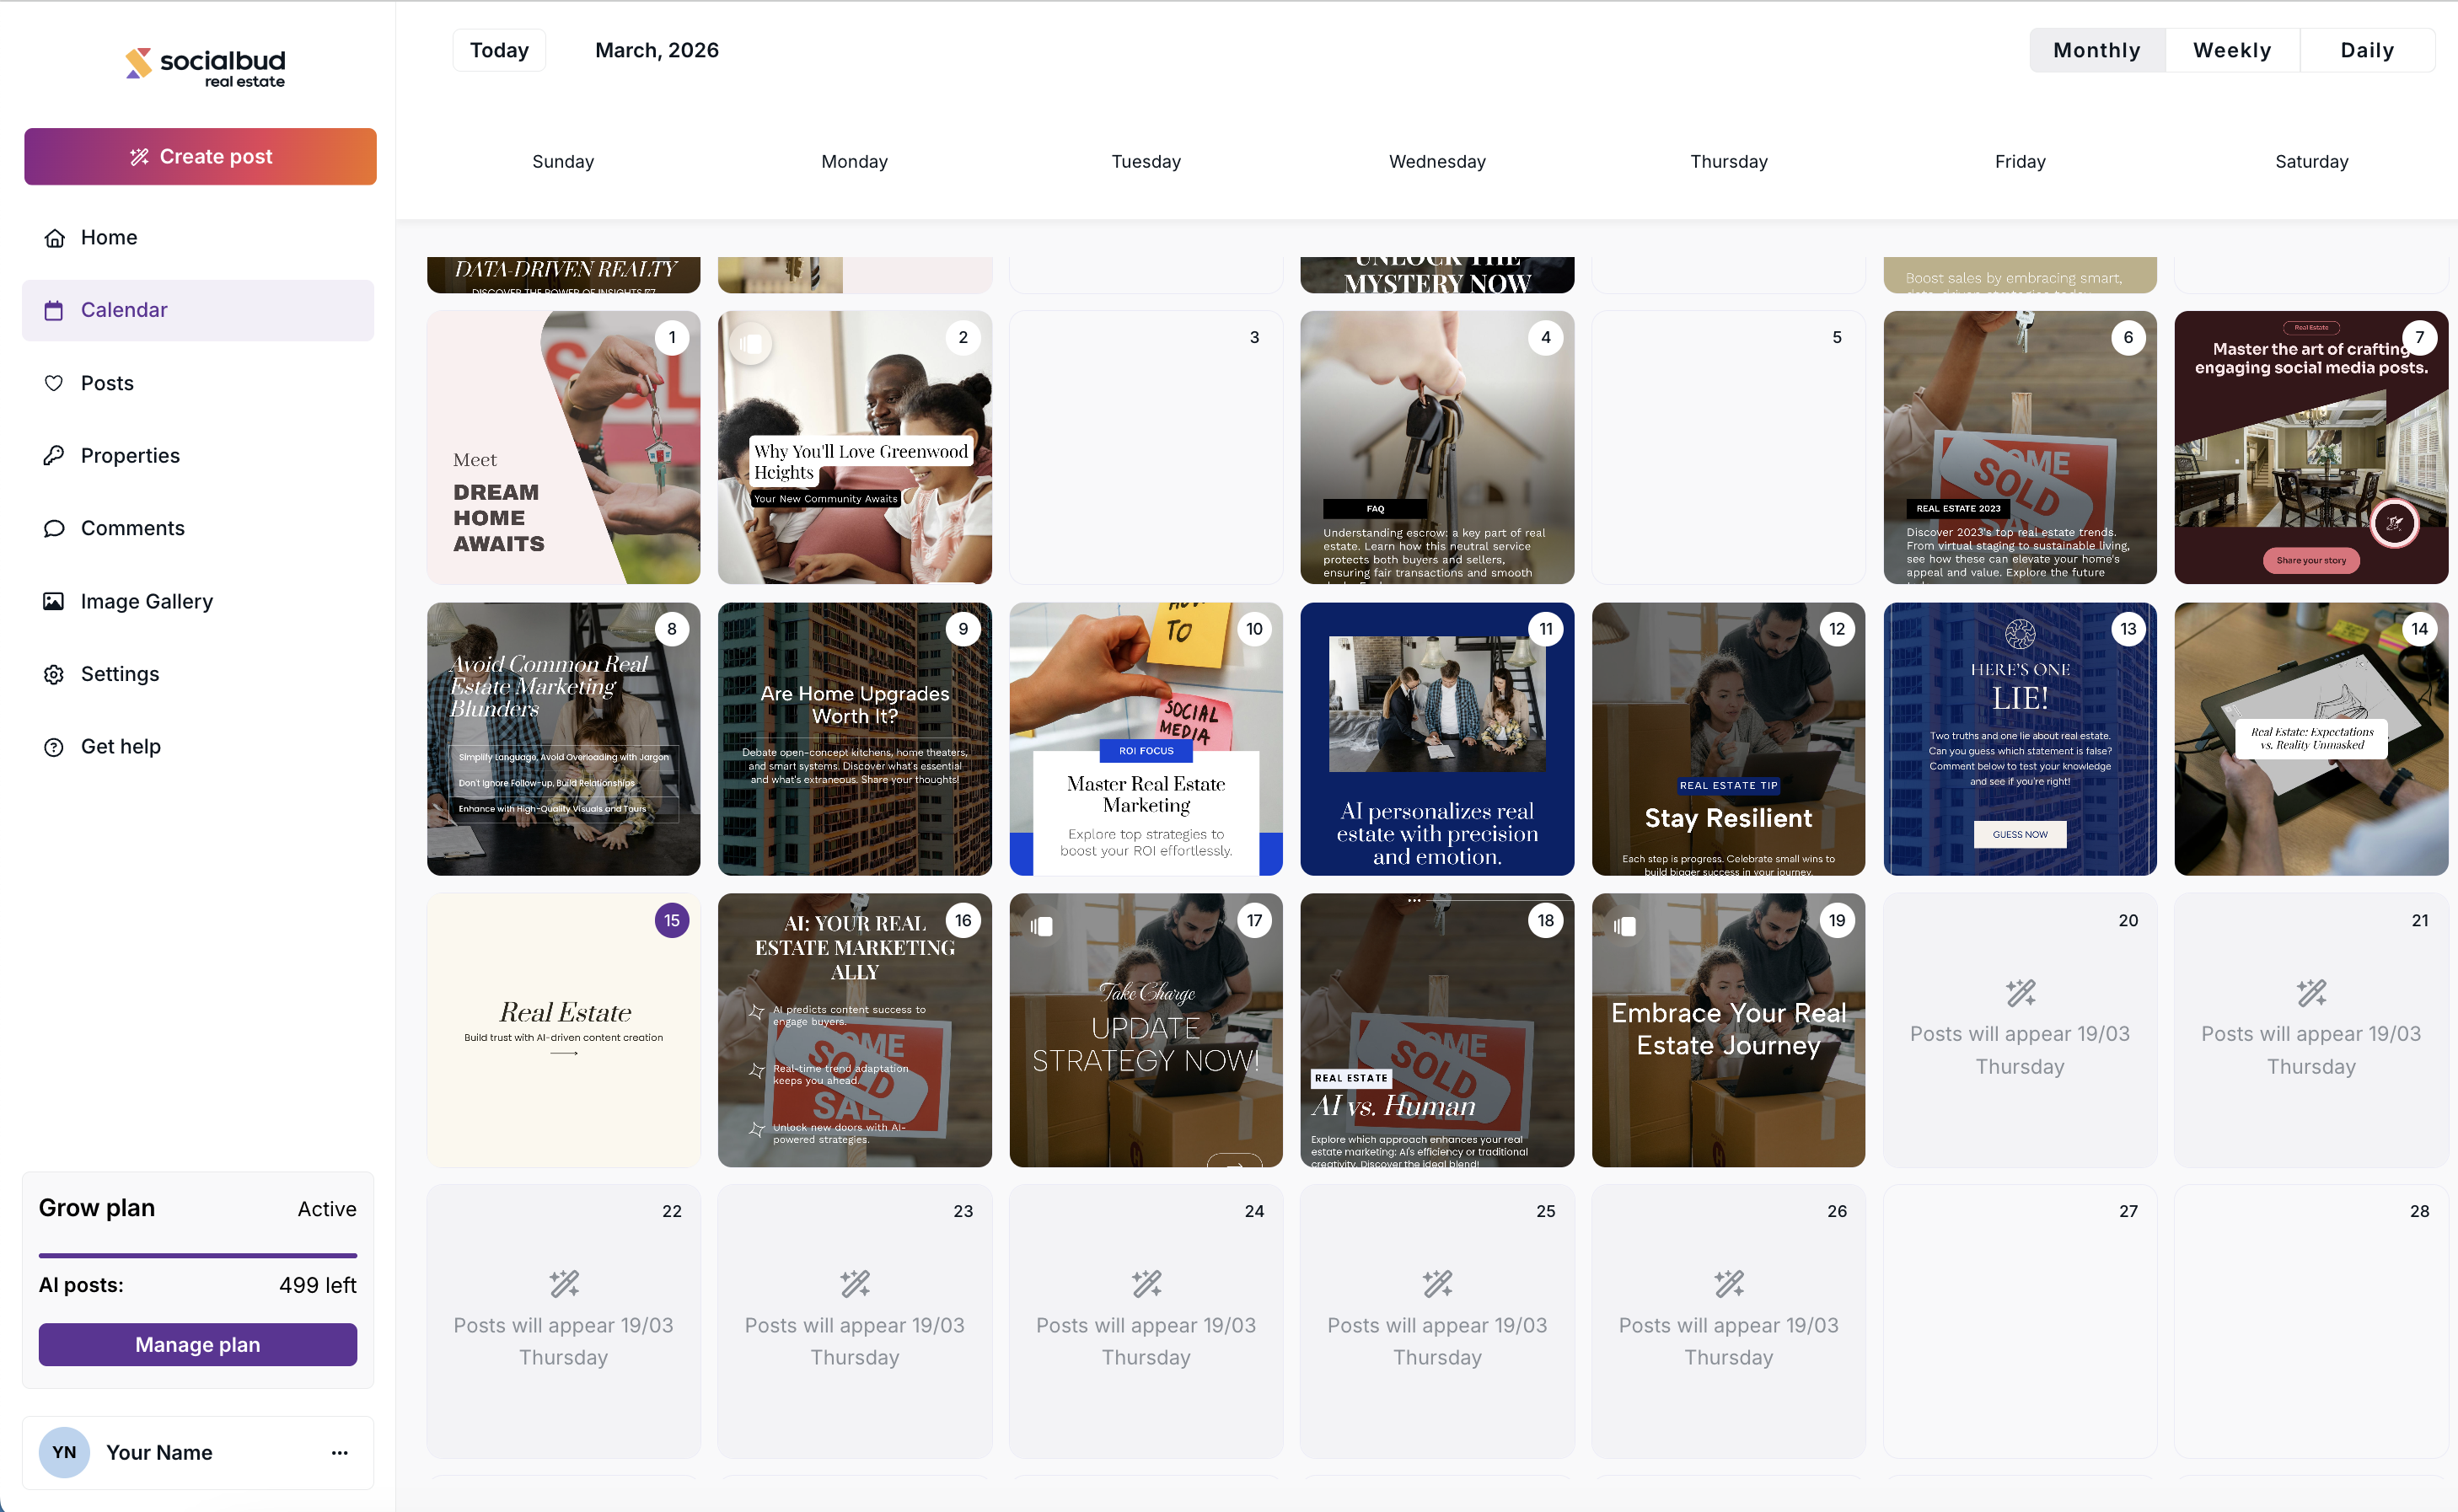
The Monthly view gives you a quick overview of your posts.
In this view you will see:
a small preview of the post visual (the image that will be published)
the position of the post in the calendar
This view is designed for quick navigation, so detailed information like caption preview, platform icons, or post status is not shown here.

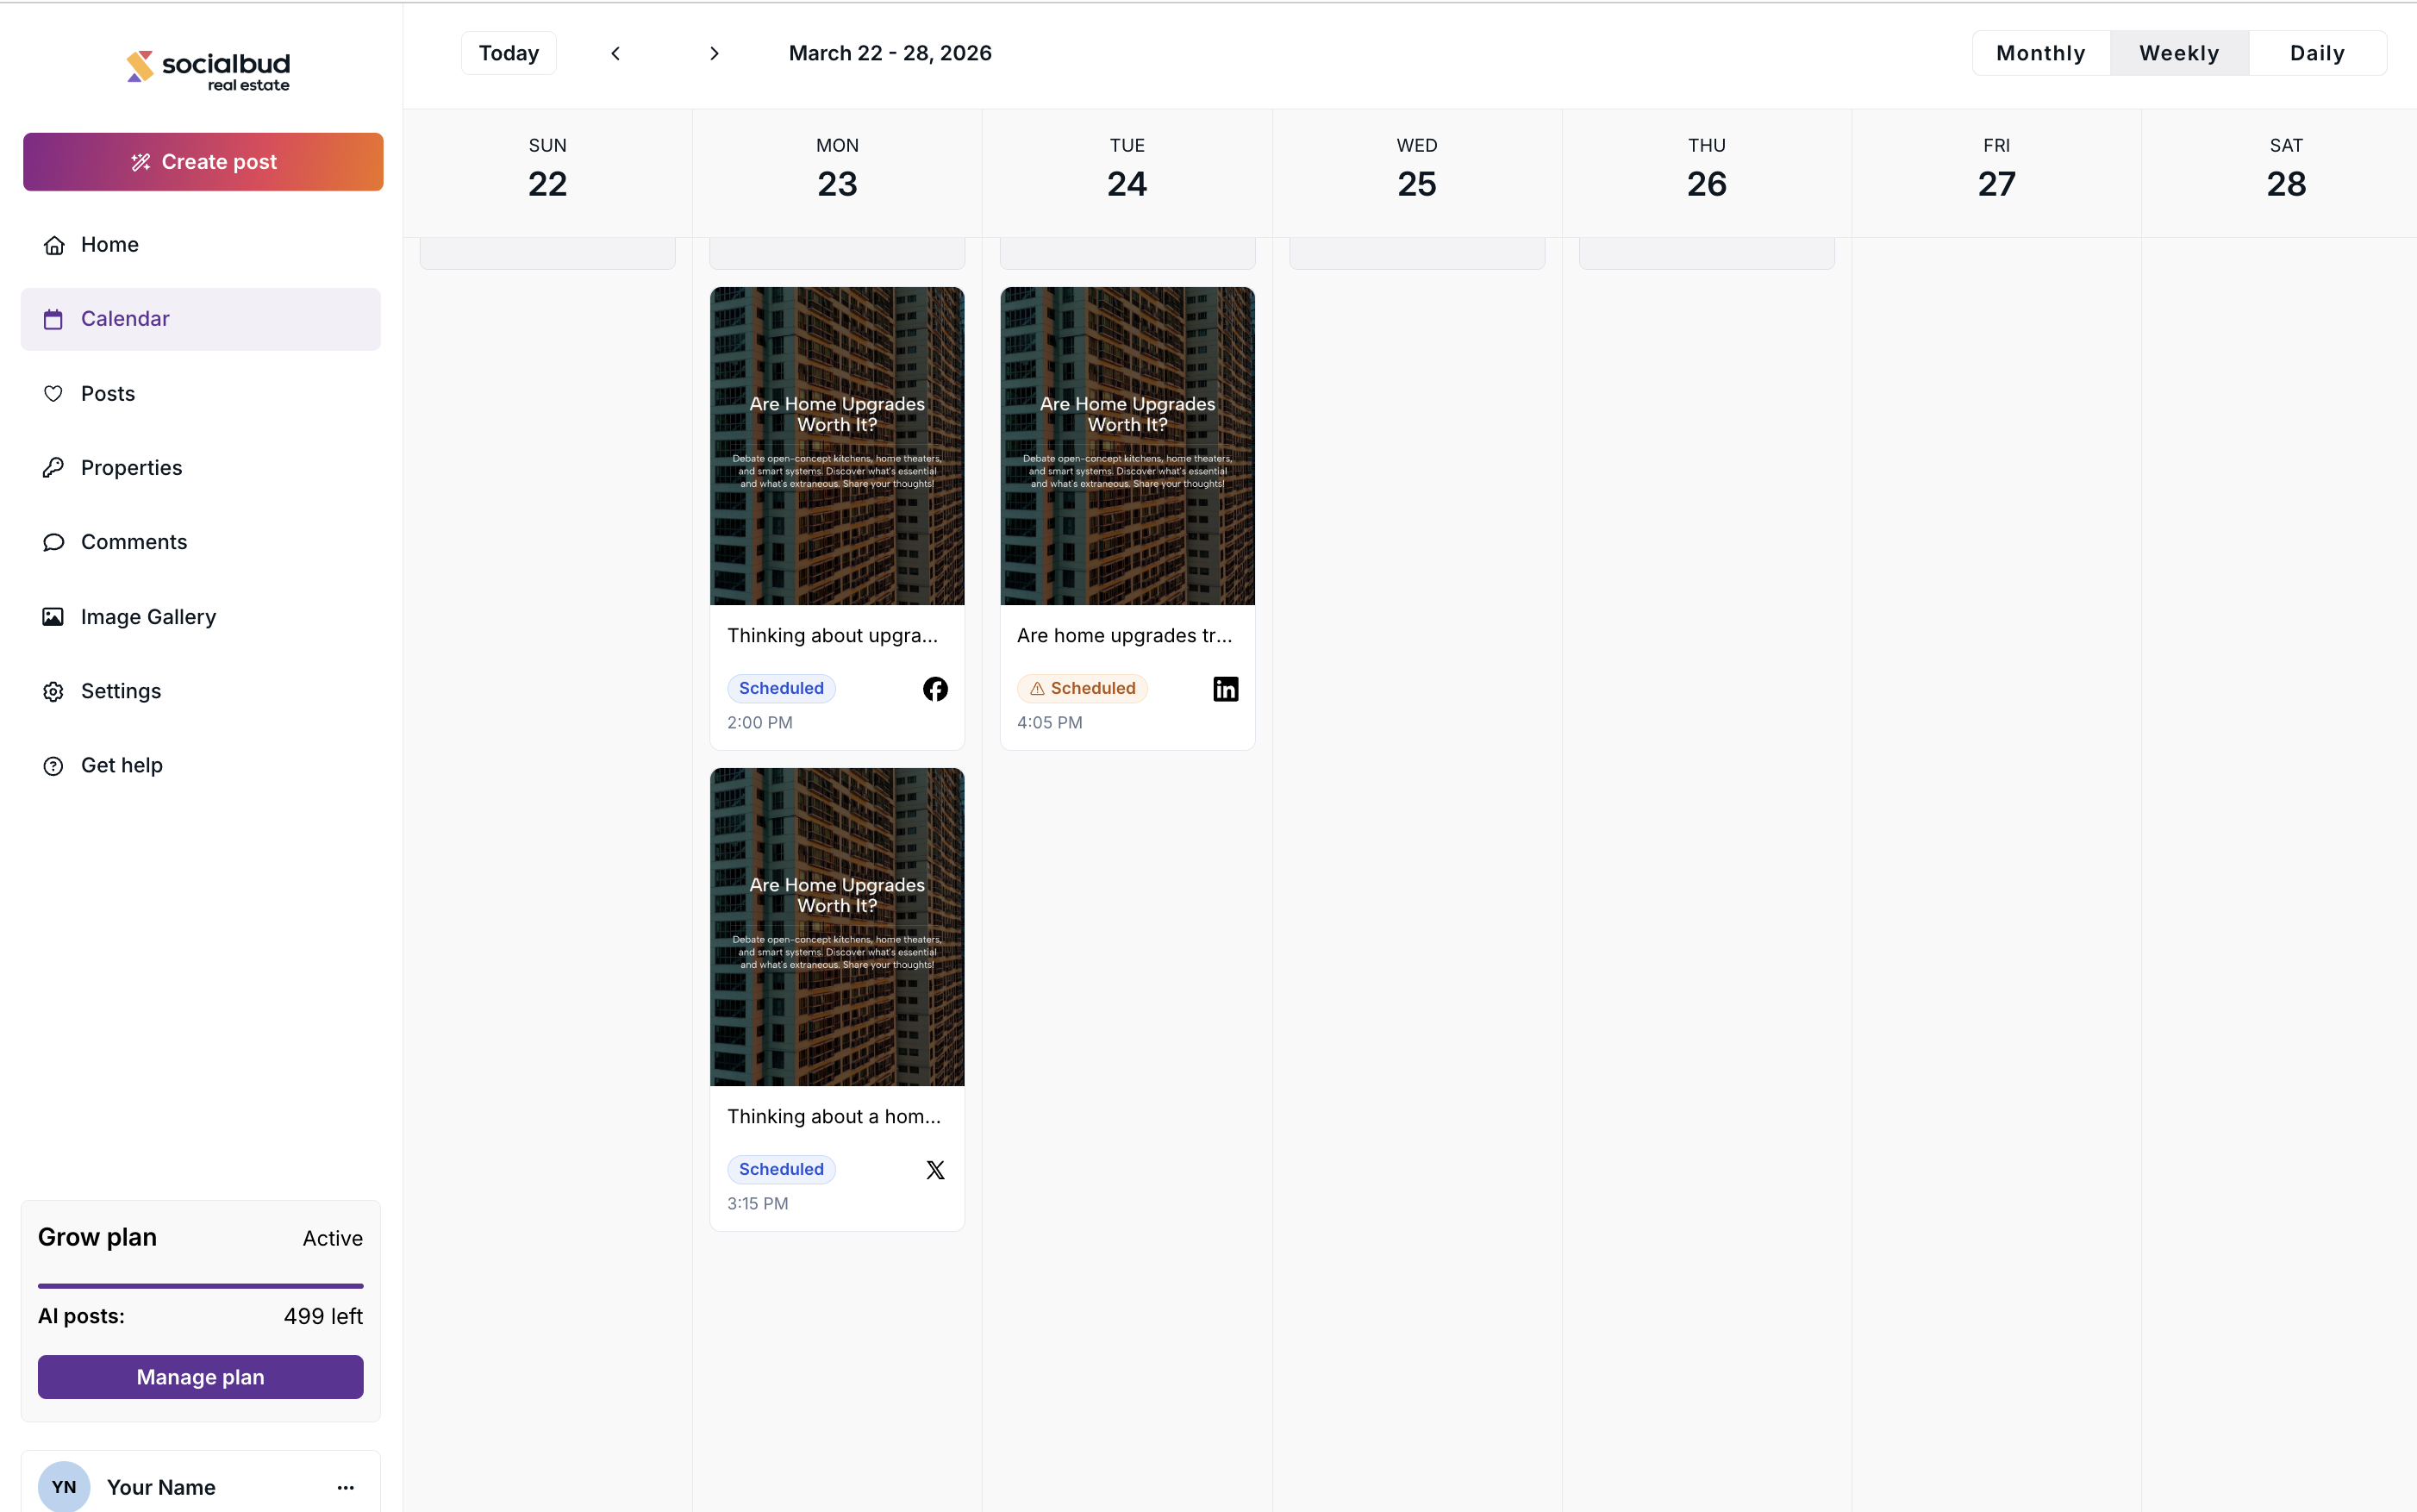
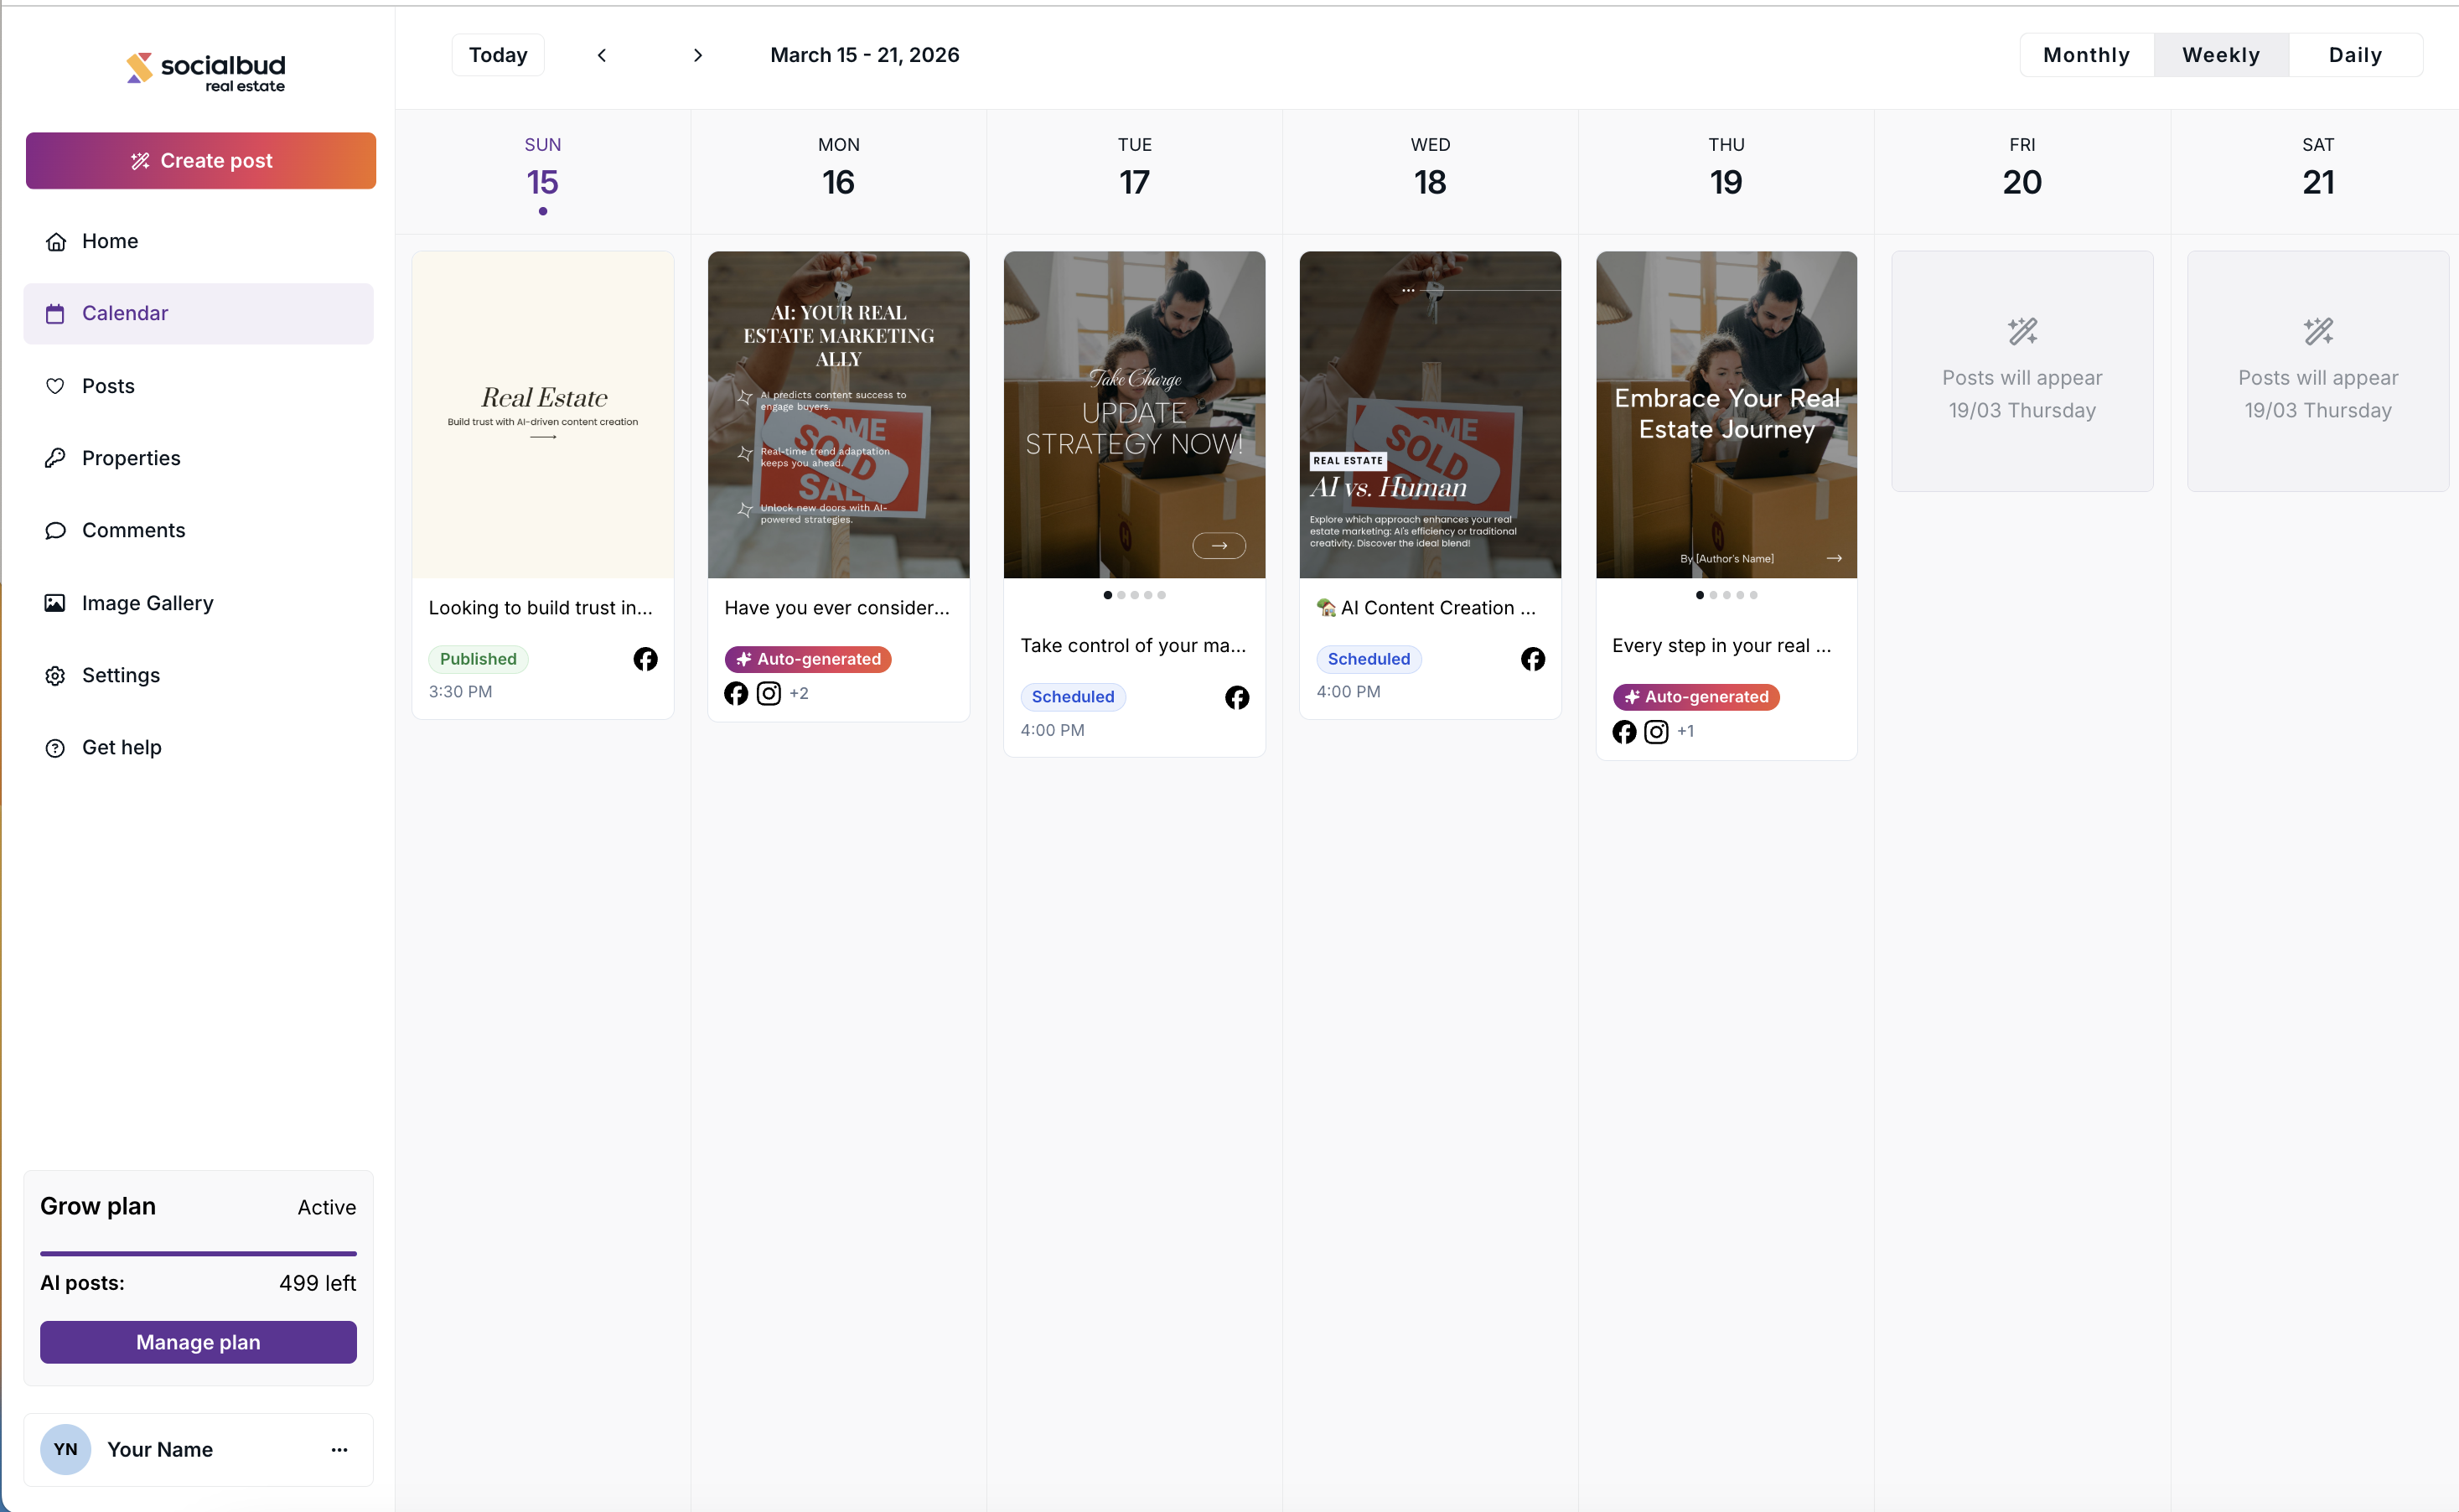
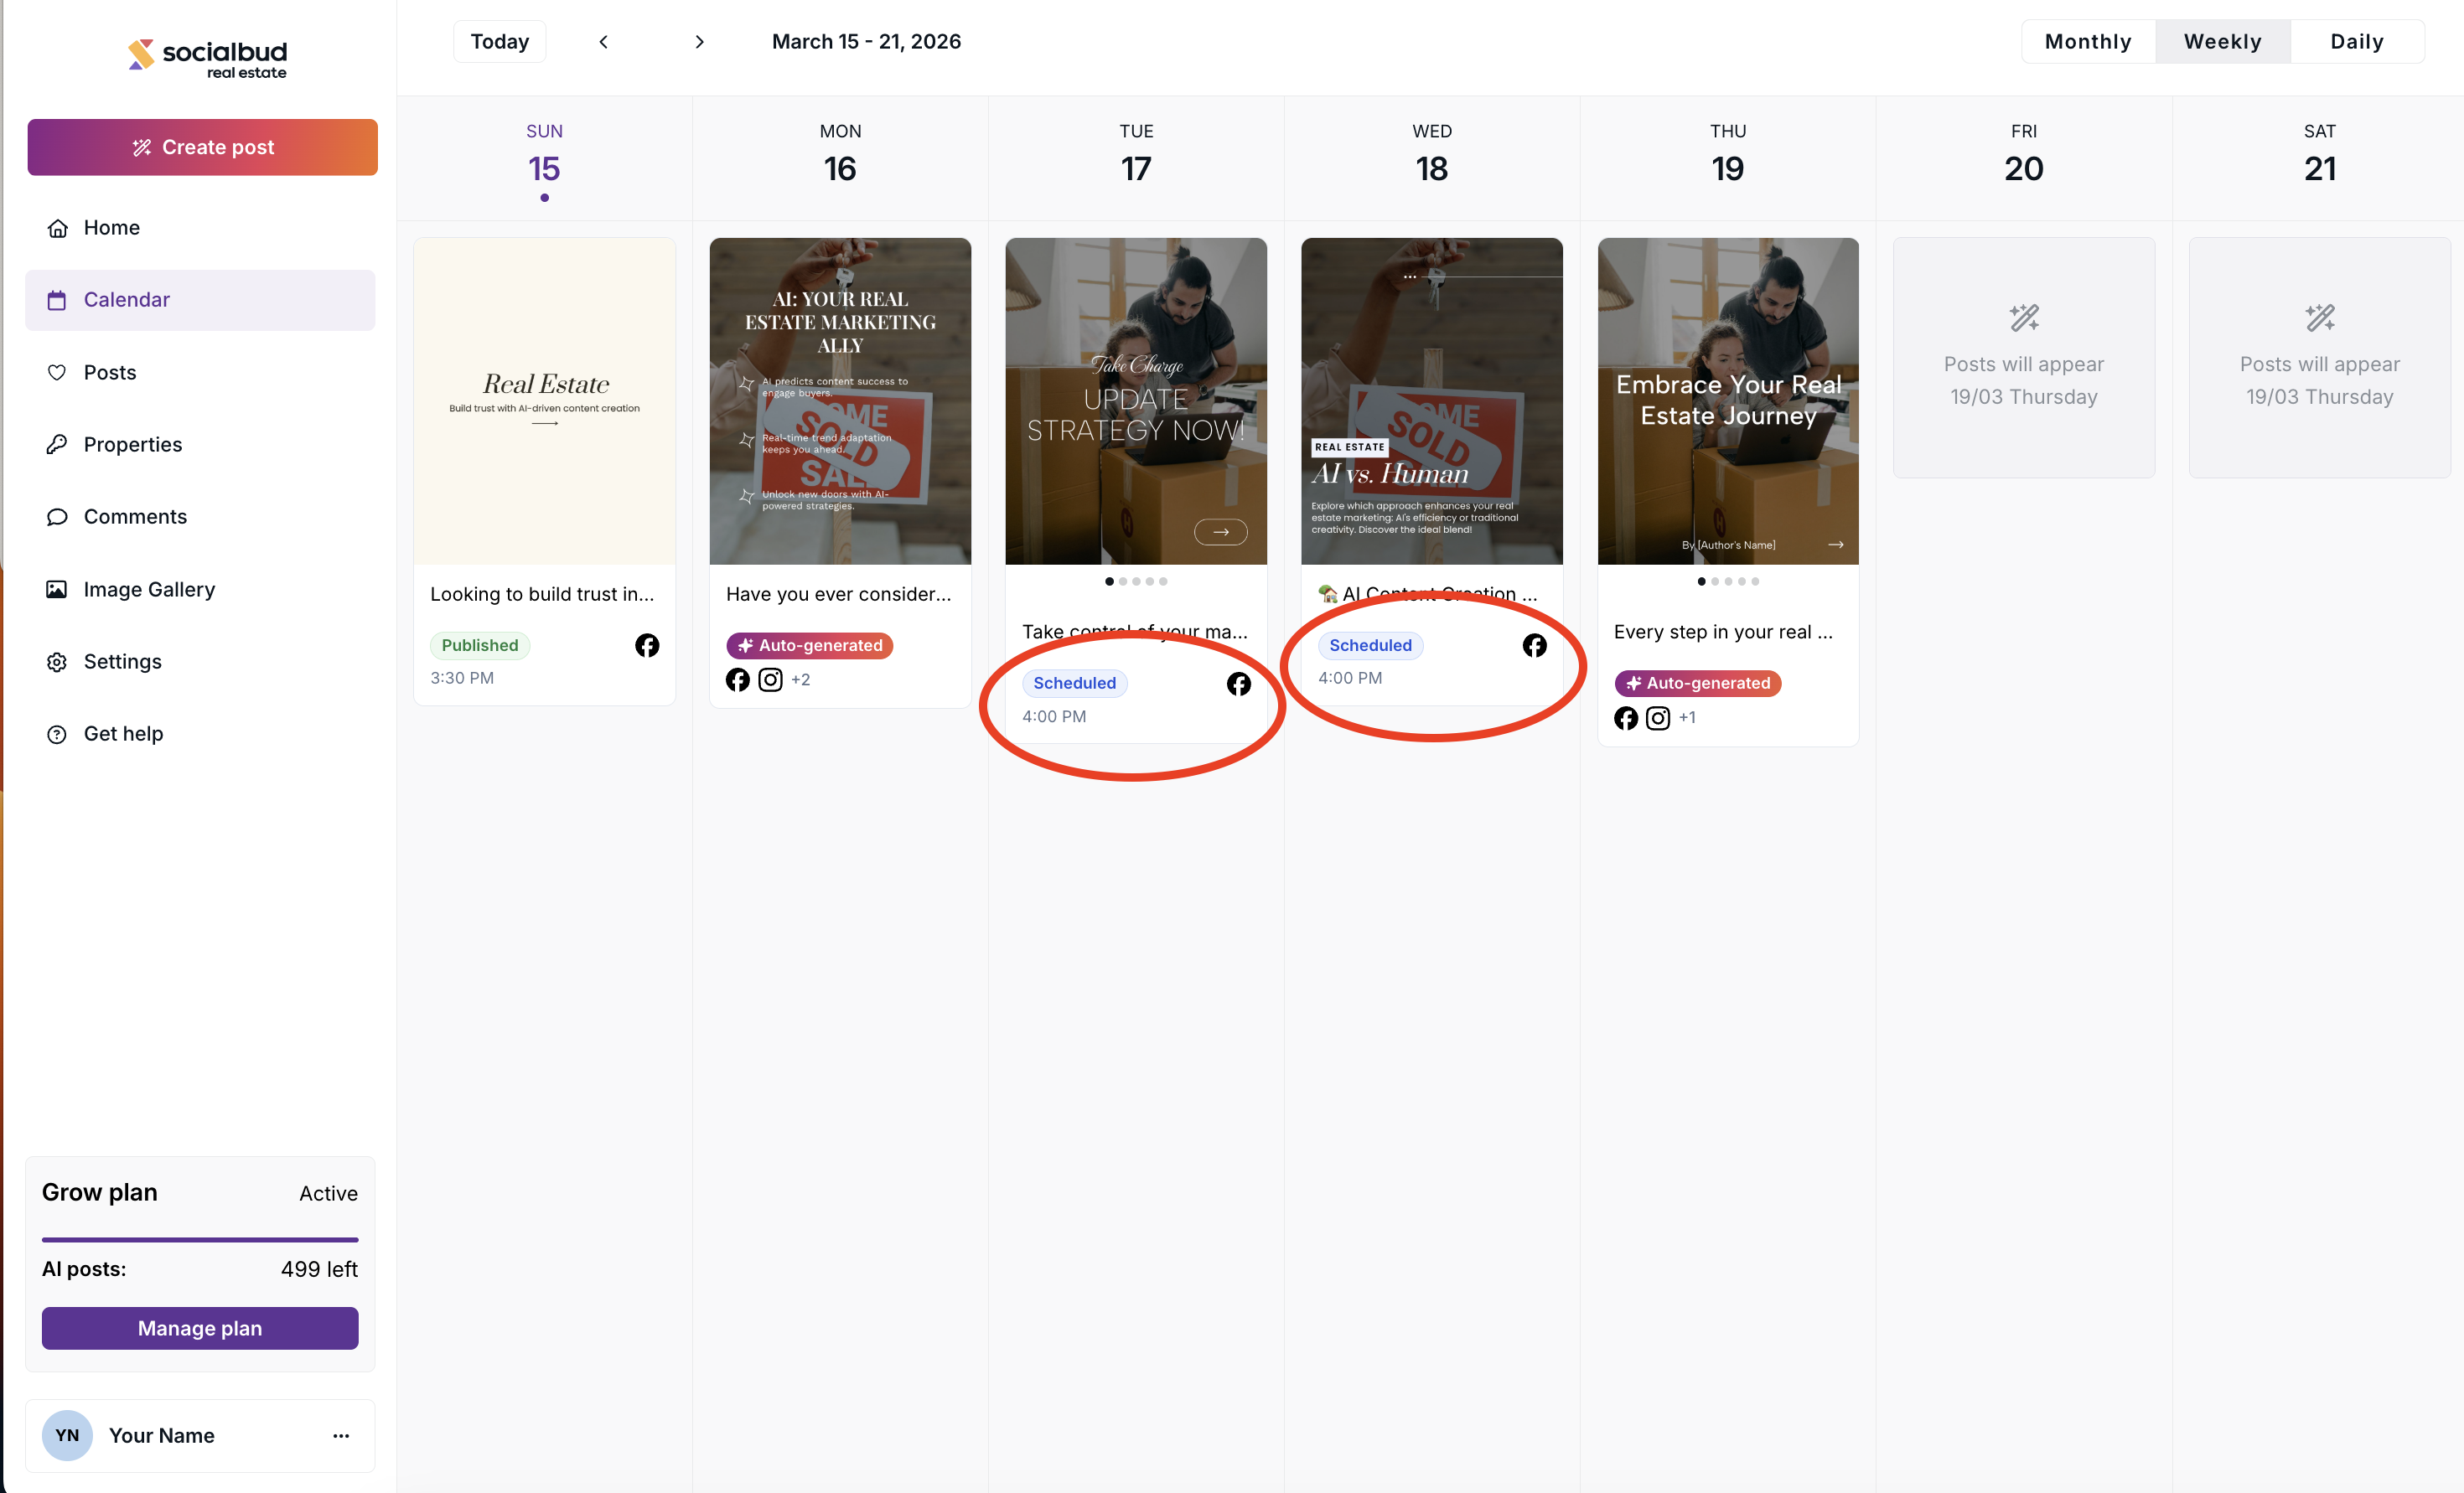
The Weekly view shows more information about each post.
In this view you can see:
the post visual preview
social platform icons showing where the post will be published
a short preview of the caption
the post status
This view is useful when you want to review your posts in more detail.
The Daily view shows posts in a timeline layout.
In this view you can see:
the post visual preview
the connected social platform icons
the exact scheduled time
the post status
The caption preview is not shown in Daily view.
To open a post in this view, click the Open button on the post.
You can open any post from the calendar to edit or manage it.
Click directly on the post to open it.
The post will open in a drawer panel on the left side of the screen.
In Daily view, click the Open button on the post to open the drawer.
When the post drawer opens, you can:
Schedule the post
Delete the post
Download the post
Rewrite the caption with AI
Edit the visual manually
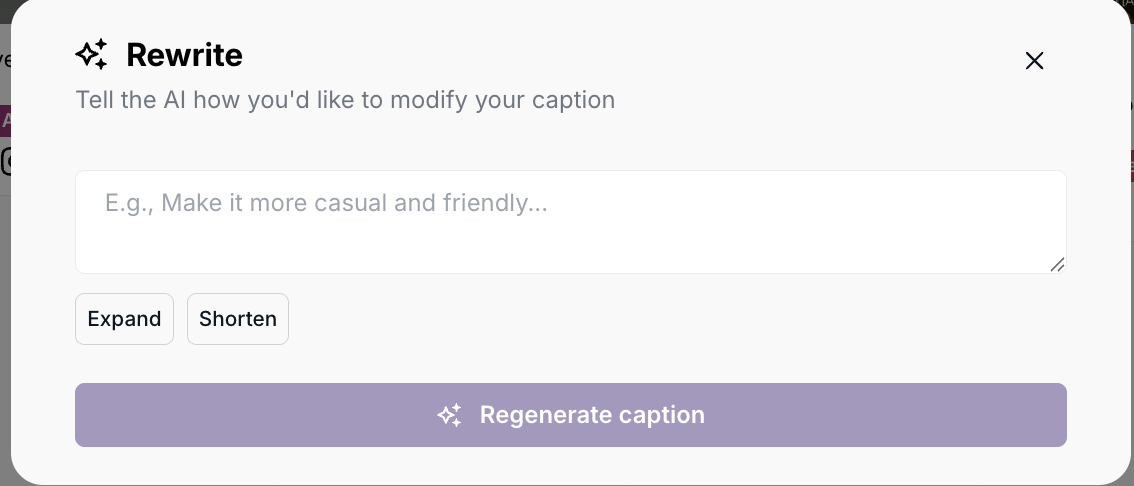
Use the Rewrite option to generate a new caption.
Click the small Edit icon on the post image to open the Manual Editor, where you can modify the visual.
Inside the drawer, you can use the Rewrite option to generate a new caption with AI.
You might also see a special illustration on your calendar—these are placeholders for future Auto-generated posts. The date when the post will be generated is displayed just below the magic wand icon.

Posts in the calendar can have different statuses.
These statuses help you understand what will happen with the post.
Statuses are visible in Weekly and Daily view.
Possible statuses:
Auto-generated — created automatically by the system
Scheduled — planned for a specific time
Published — successfully posted to a connected platform
Failed — the post could not be published -see more details in the failed post.
Platforms can be connected in:
Settings → Platforms & Schedule
Some posts in the calendar are created automatically by Socialbud.
These posts are generated based on:
the styles you selected,
the business information you provided manually, or the information imported from your website during setup.
Auto-generated posts help you keep your social media active, but you can fully edit, rewrite, schedule, download or delete them anytime.
Meaning: The post is scheduled for a future date.
Actions available
Reschedule the post.
Edit the post.
Download the post visual.
Delete the post

Meaning: The post has been successfully published to all selected platforms.
Actions Available:
Download the post visual.
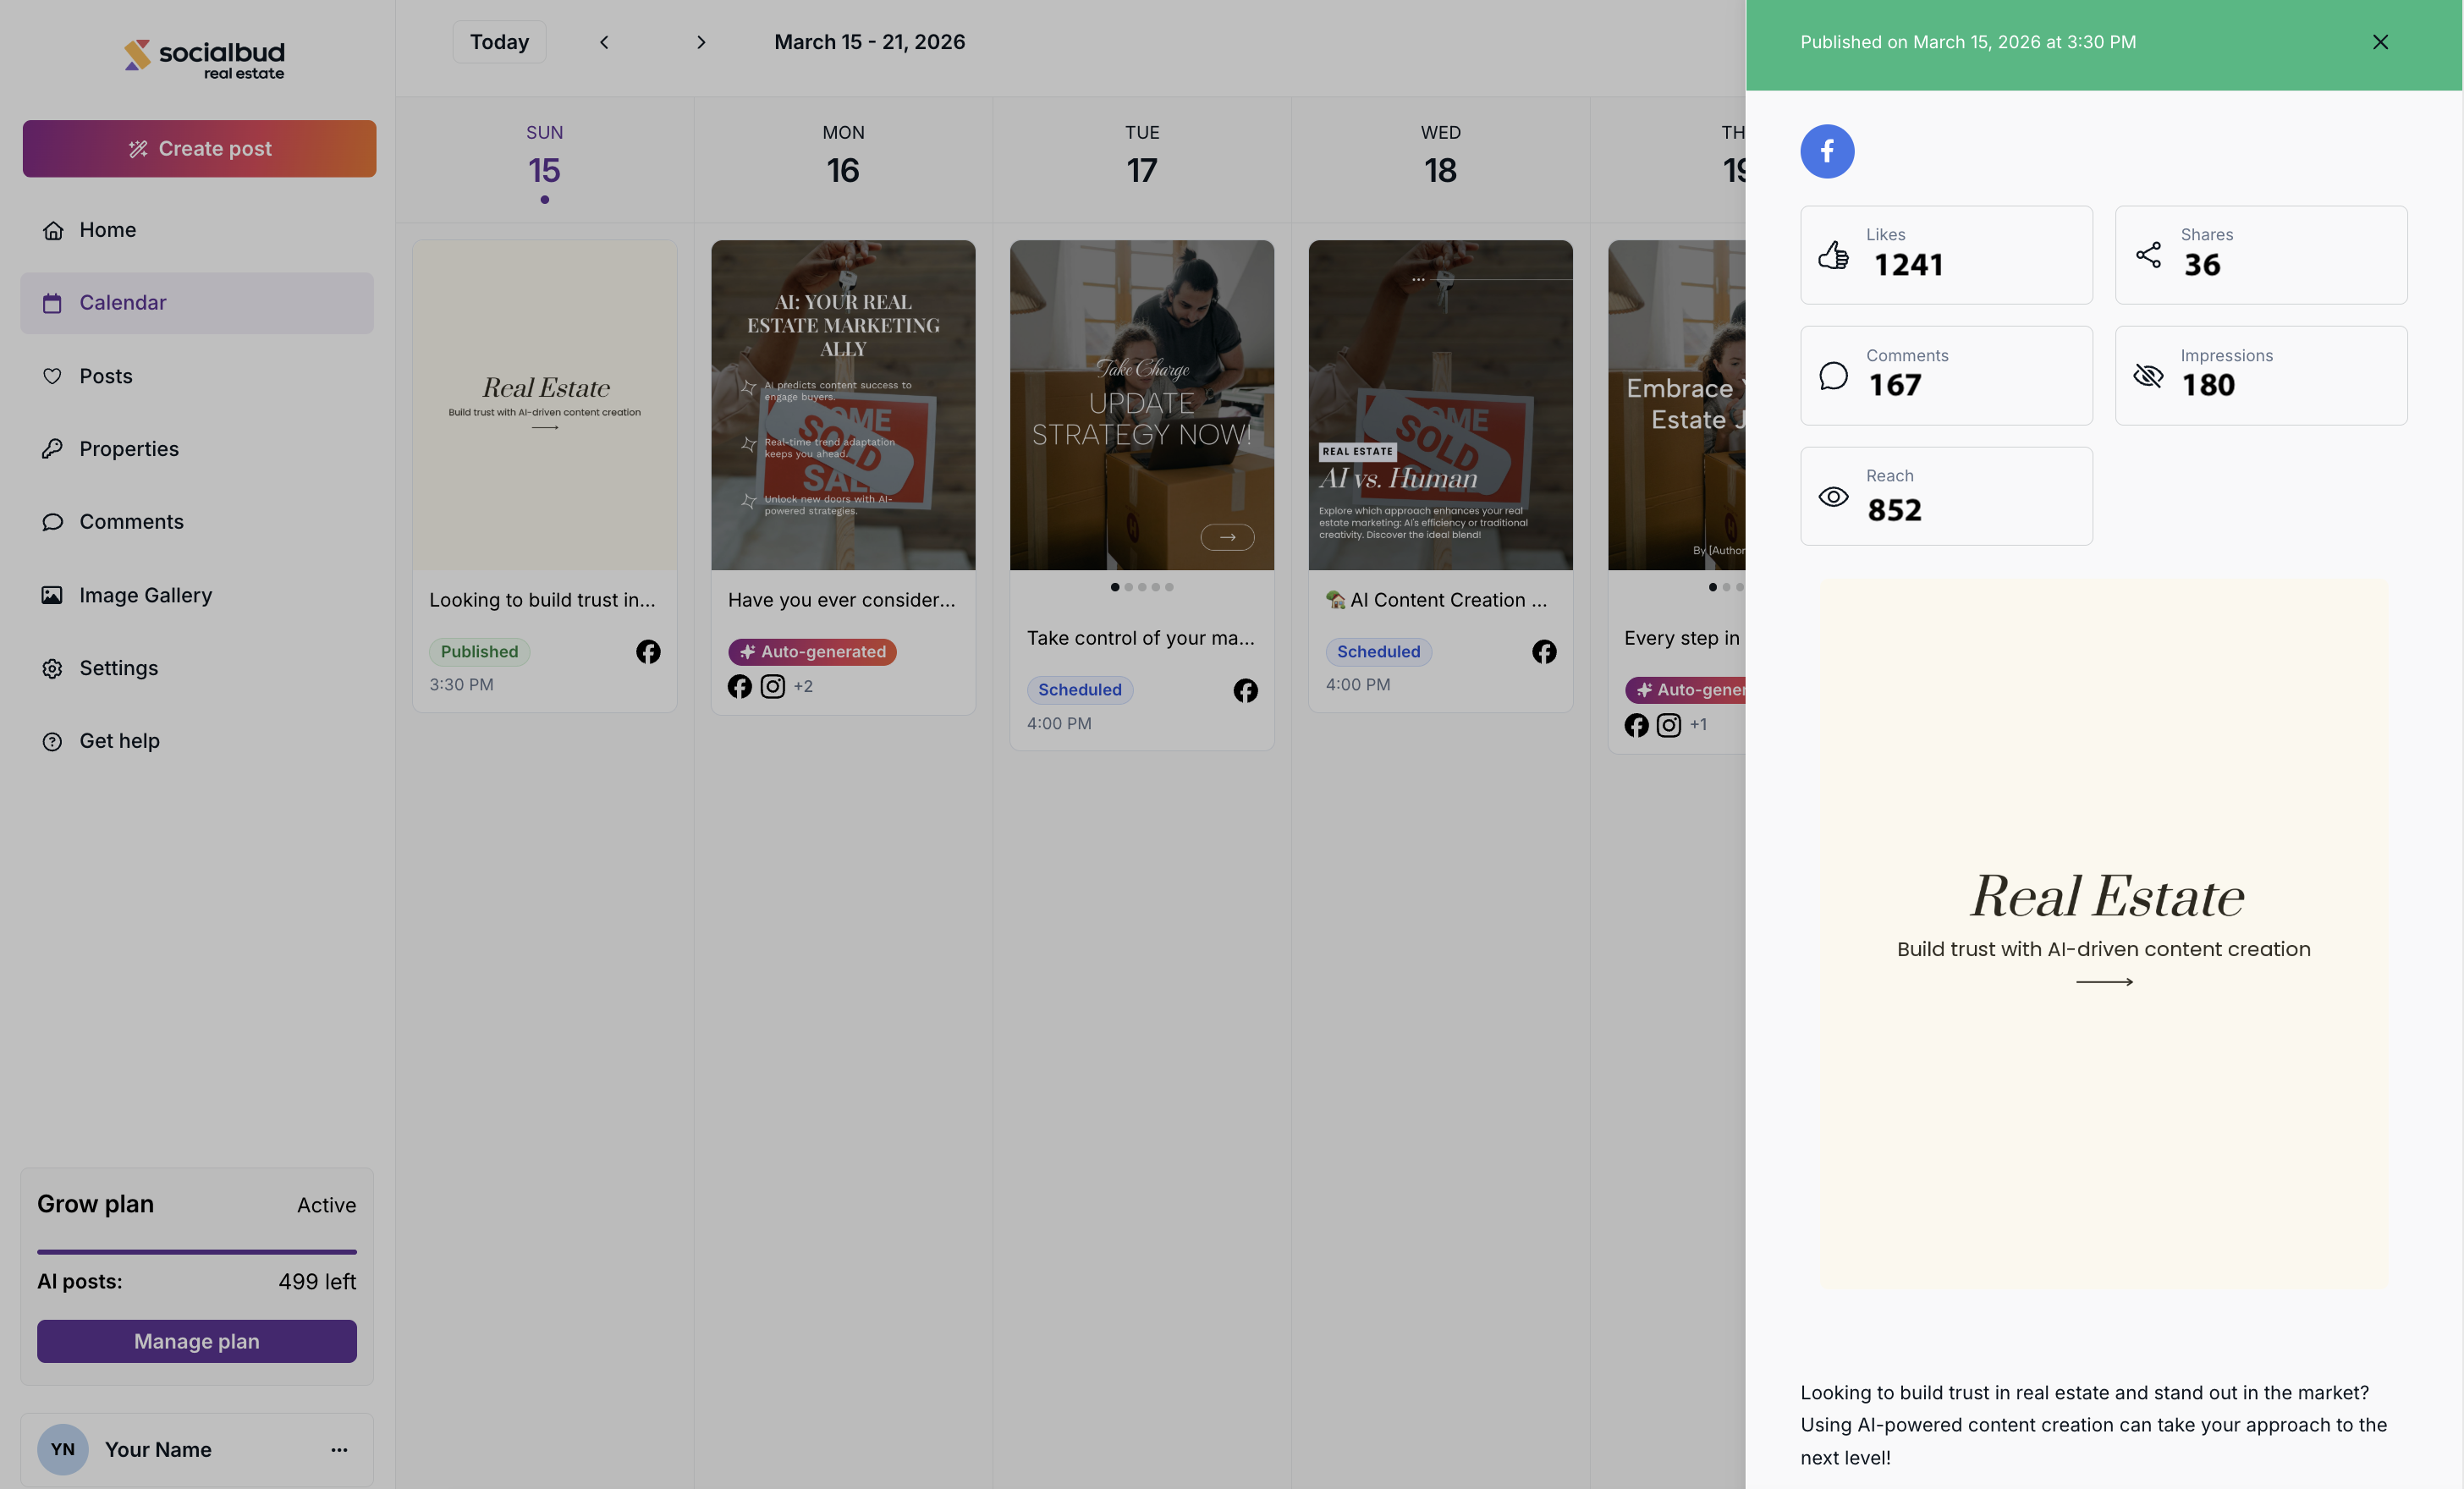
View post analytics
When a post is published, you can open it from the Calendar to see its performance statistics.
The analytics panel shows the following metrics:
Likes — number of likes the post received
Shares — number of times the post was shared
Comments — number of comments on the post
Impressions — how many times the post was displayed
Reach — how many unique users saw the post
Analytics are shown based on the connected social platforms where the post was published.
You can manage your connected platforms in Settings → Platforms & Schedule.
A red exclamation mark appears only on published posts and indicates that the post could not be published to one or more social media platforms. This can happen for various reasons, such as a deactivated account.
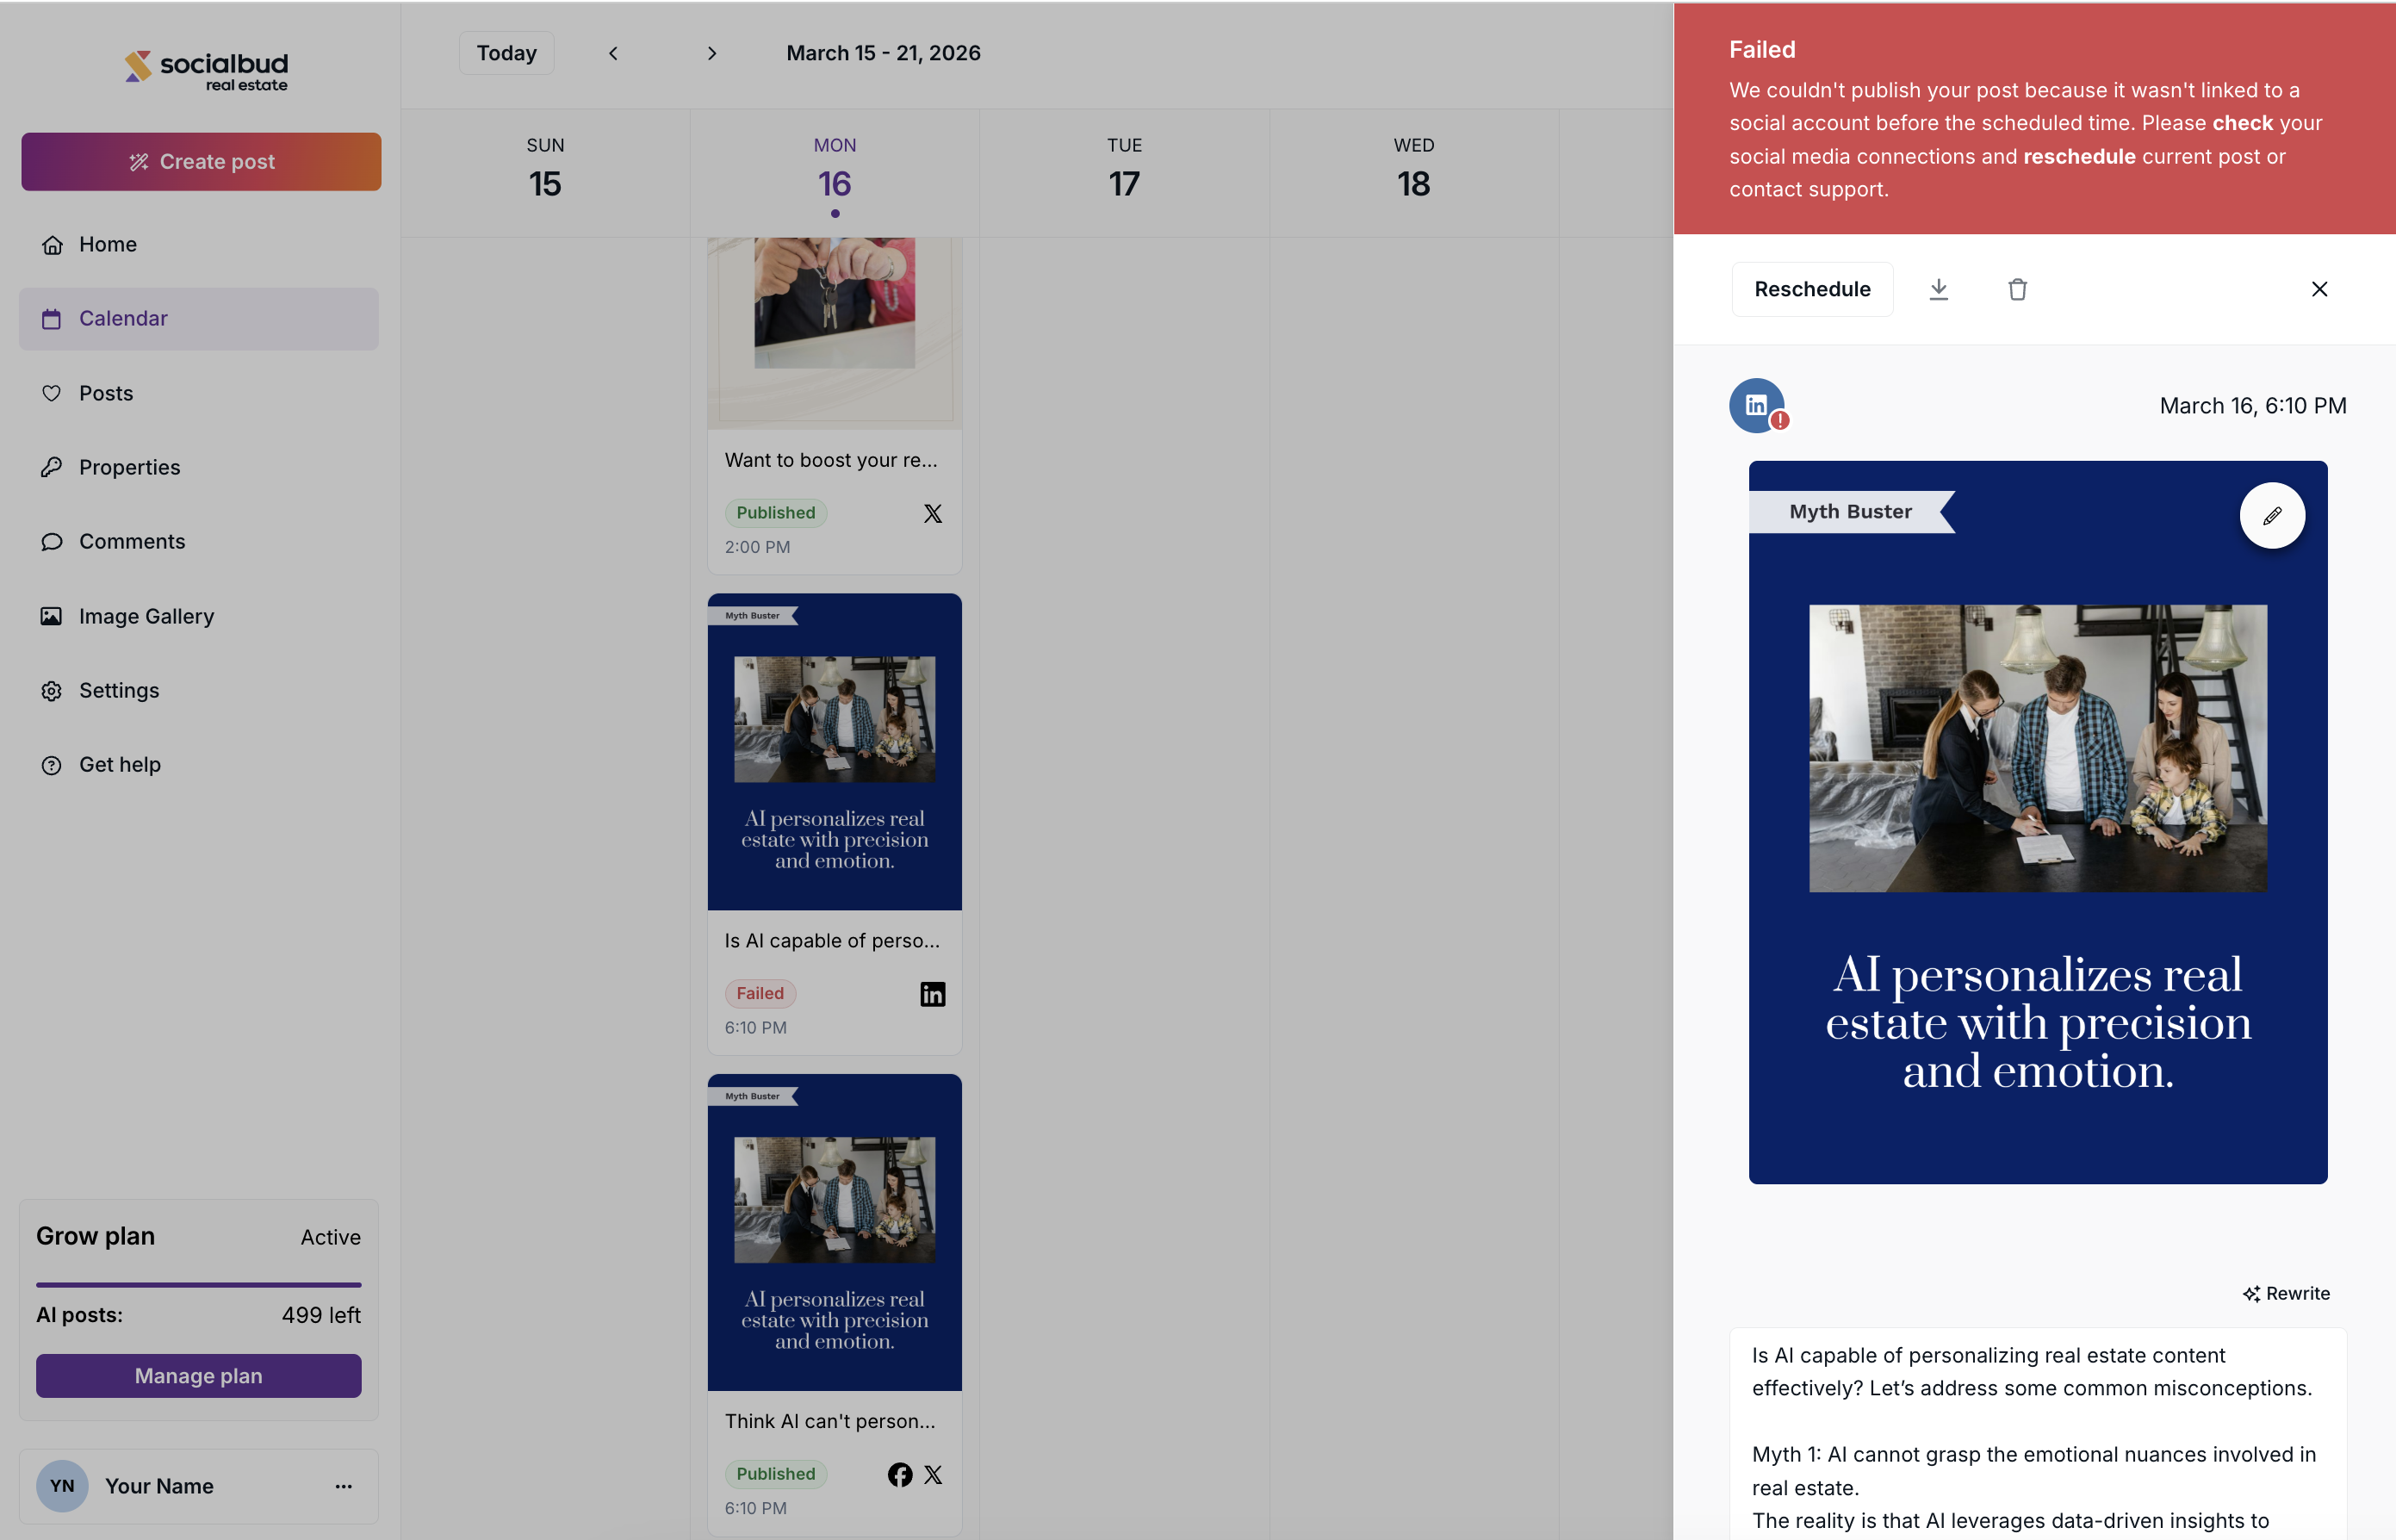
Resolve the Failed status:
If a post has Failed status, follow the instructions shown in the error message to fix the issue. After completing the required steps, schedule the post again.
Try to reschedule your post by clicking on the post and then clicking on the Reschedule button on the top toolbar.
Check if you connected your social media accounts correctly.
Learn more:
In some cases, you might notice a yellow or red exclamation mark next to one or more social media platform icons on your posts. These icons indicate that while the post was successfully scheduled or published, it encountered issues with one or more social media platforms.
Yellow exclamation mark
This indicates that one or more social media platforms are not connected.
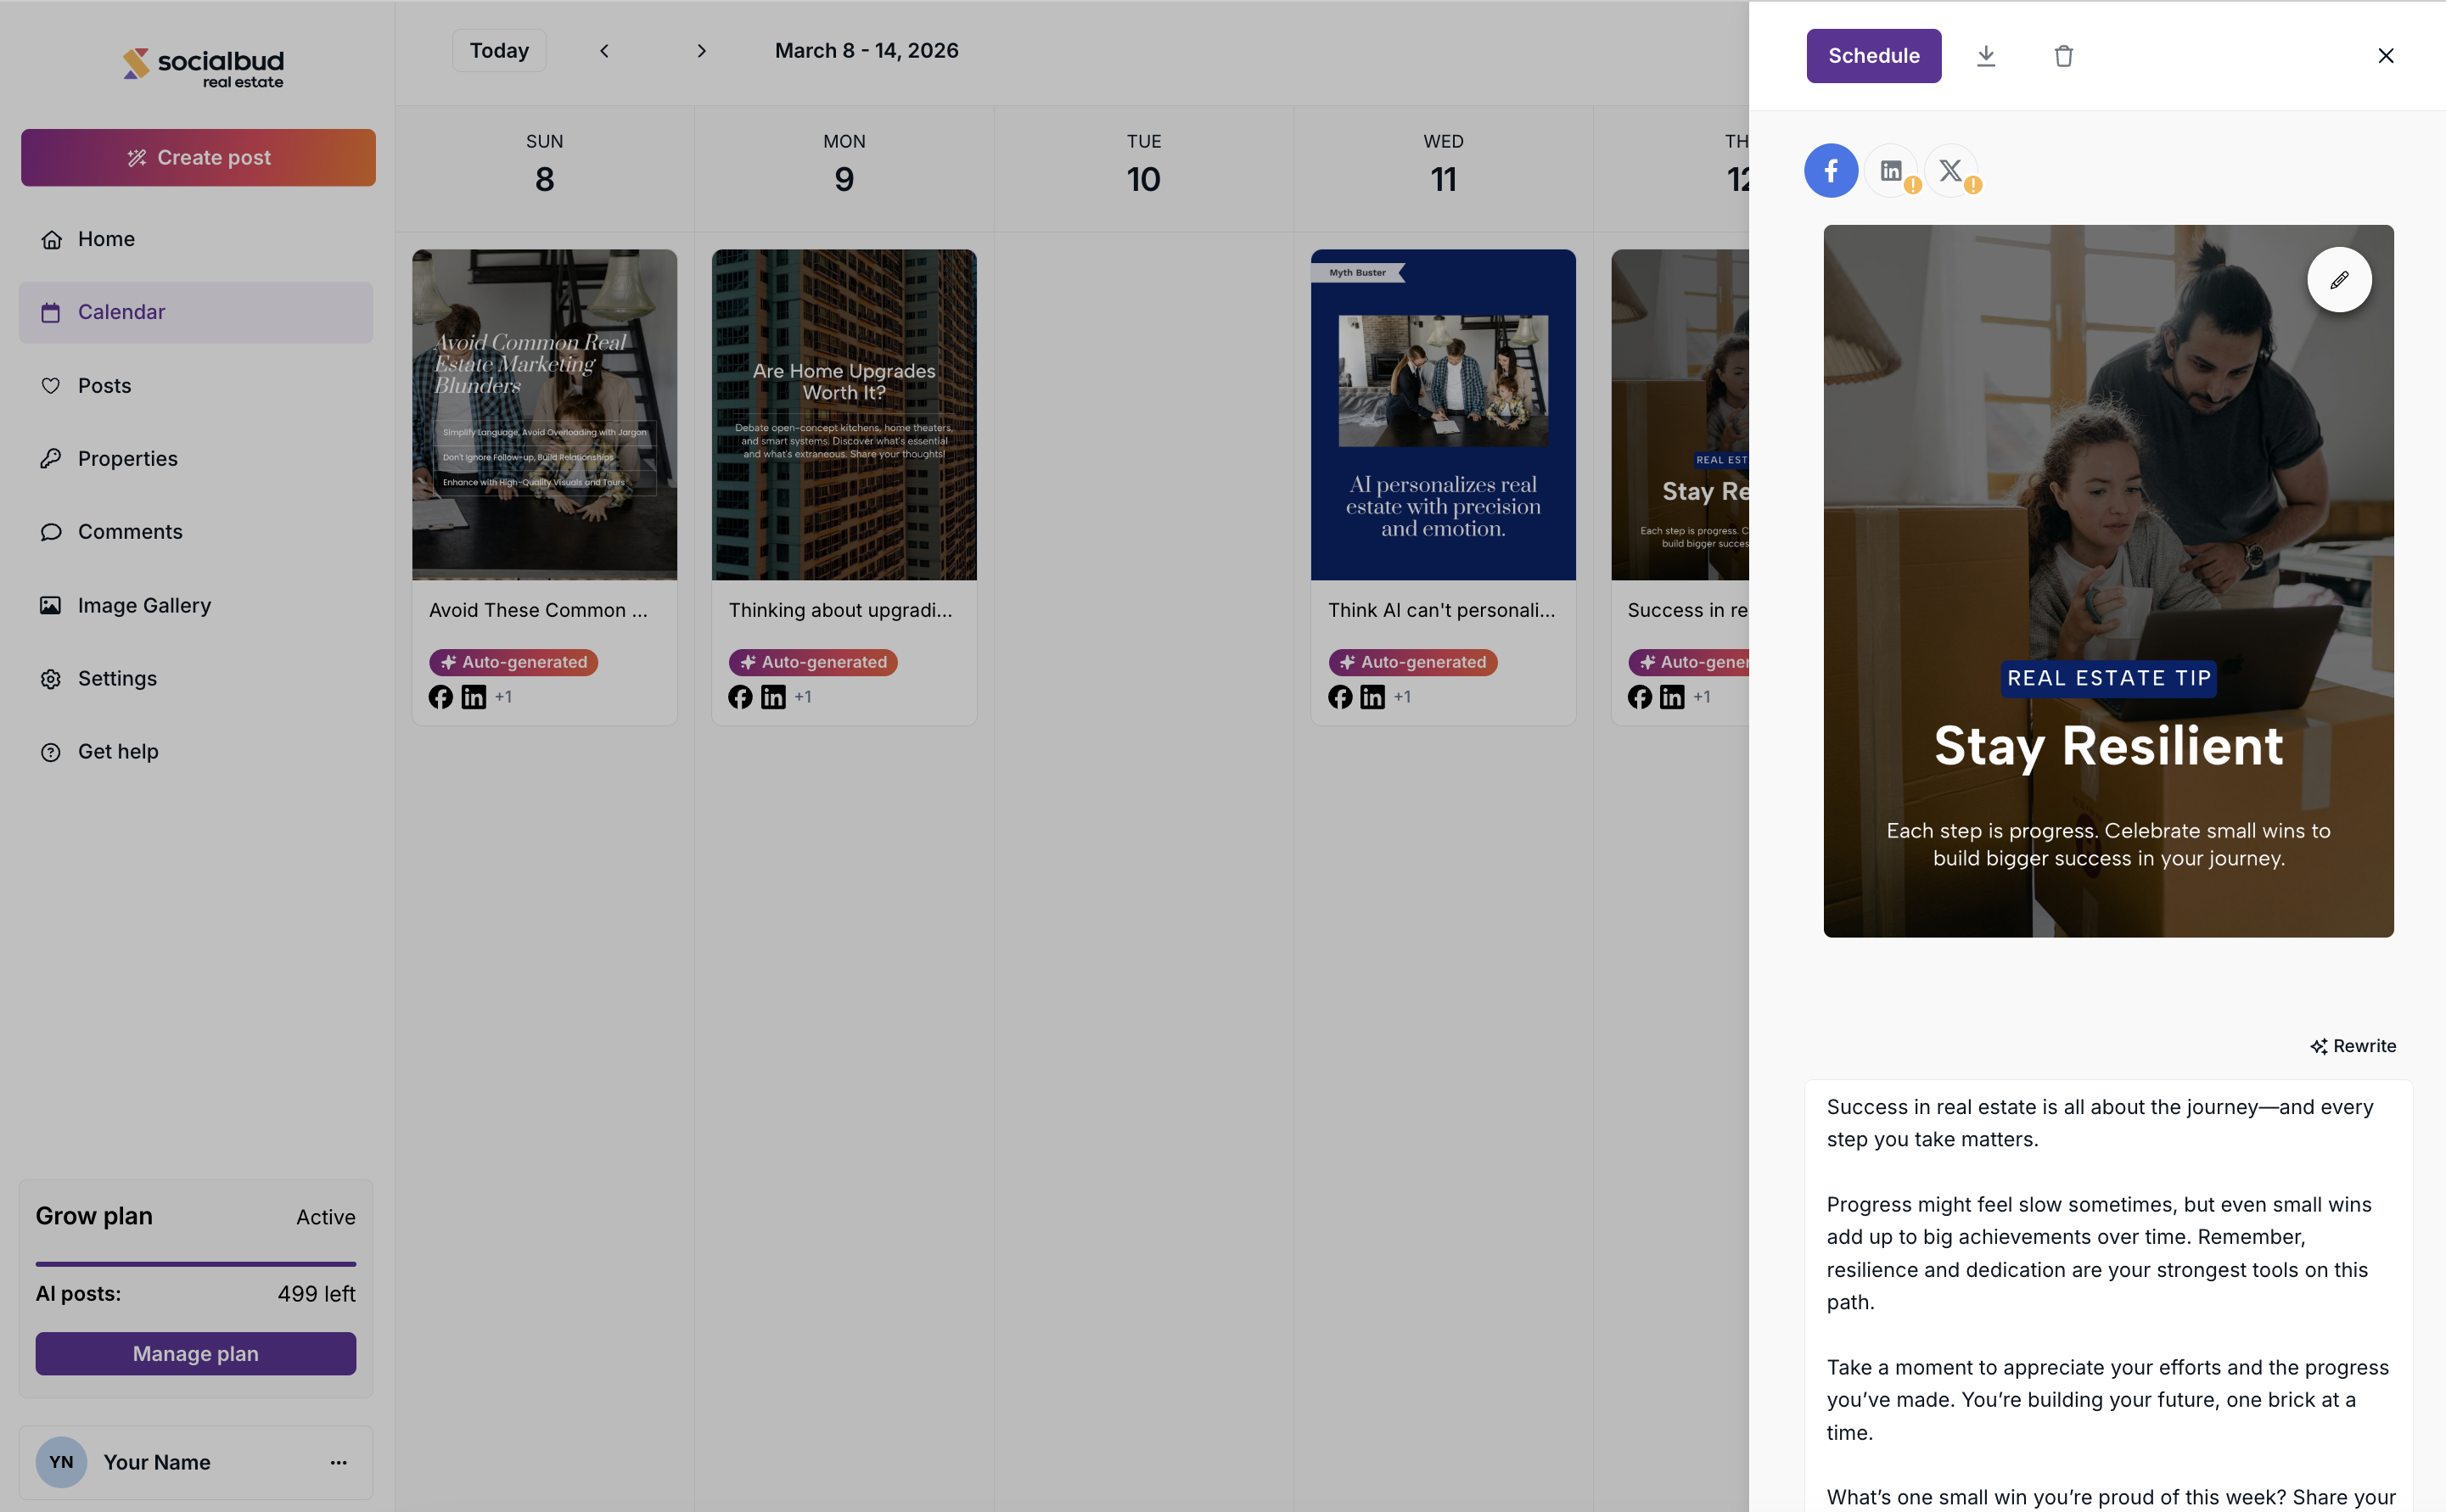
To resolve this issue, follow these steps:
Click on the post with the yellow exclamation mark.
In the sidebar that appears, locate the social media icon with the yellow exclamation mark. Below it, you’ll see a message specifying which platform is not connected.
Click the yellow message, then select the Connect button to reconnect Socialbud to the affected platform. This section will be highlighted in yellow for easy identification.
Refer to visit our Connecting your social channels to Socialbud Article for additional instructions on connecting your accounts.
Connecting your social channels to Socialbud
How to connect your social media platform account to Socialbud
If you changed your mind regarding a post's content, don't worry, you can edit the post as long as it has a Scheduled or Failed status. You can't edit posts that are Published.
Follow these steps to access the Post editor:
Click the calendar item in the left navigation bar
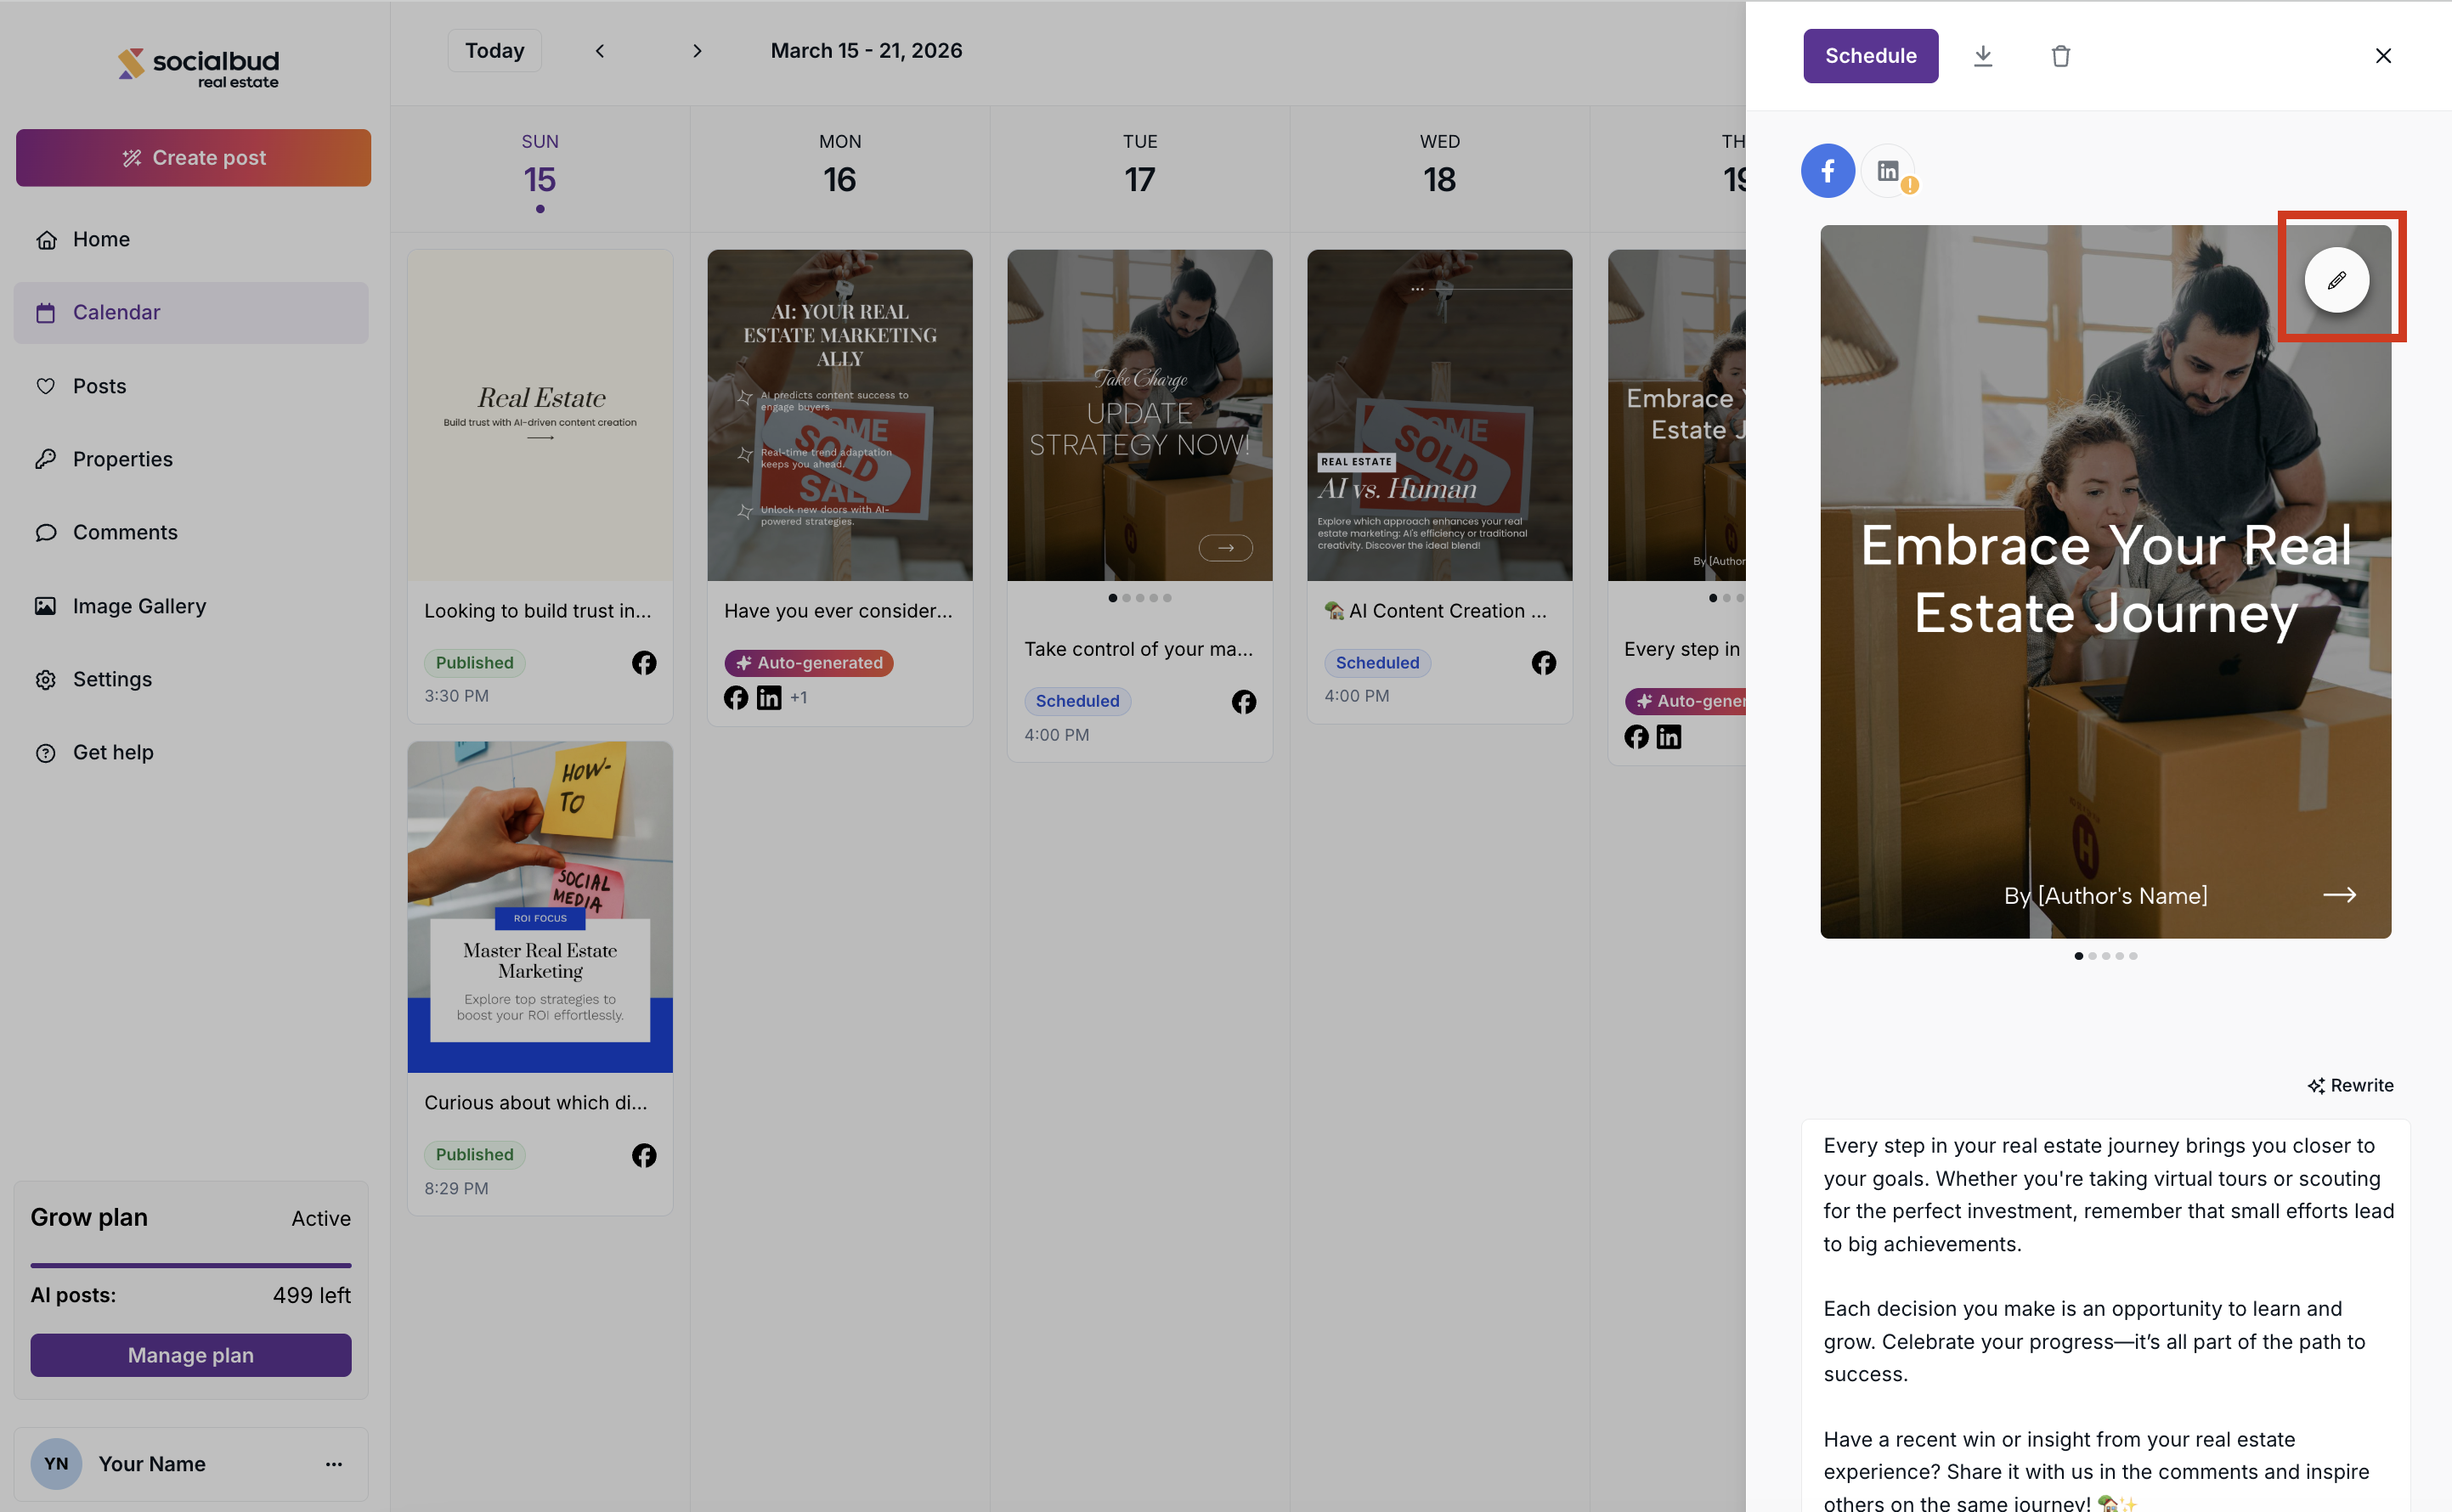
In weekly or daily view, click on any scheduled post to open the post details sidebar. Here you’ll see details related to the selected post.
Inside the sidebar, take a look at the top section. If there are multiple social media accounts that this post is scheduled to, you can now select which social media variant you'd like to edit by clicking on the desired social media icon.
Click the small pencil icon on the post visual. This opens up the post editor for the selected social media platform.
When you finish editing the post visual in the Manual editor and click Save, a confirmation modal will appear.
In this modal, you can choose where you want to apply the changes.
If the post is scheduled for multiple platforms, you can decide to:
apply the changes only to the currently selected platform, or
apply the changes to all platforms
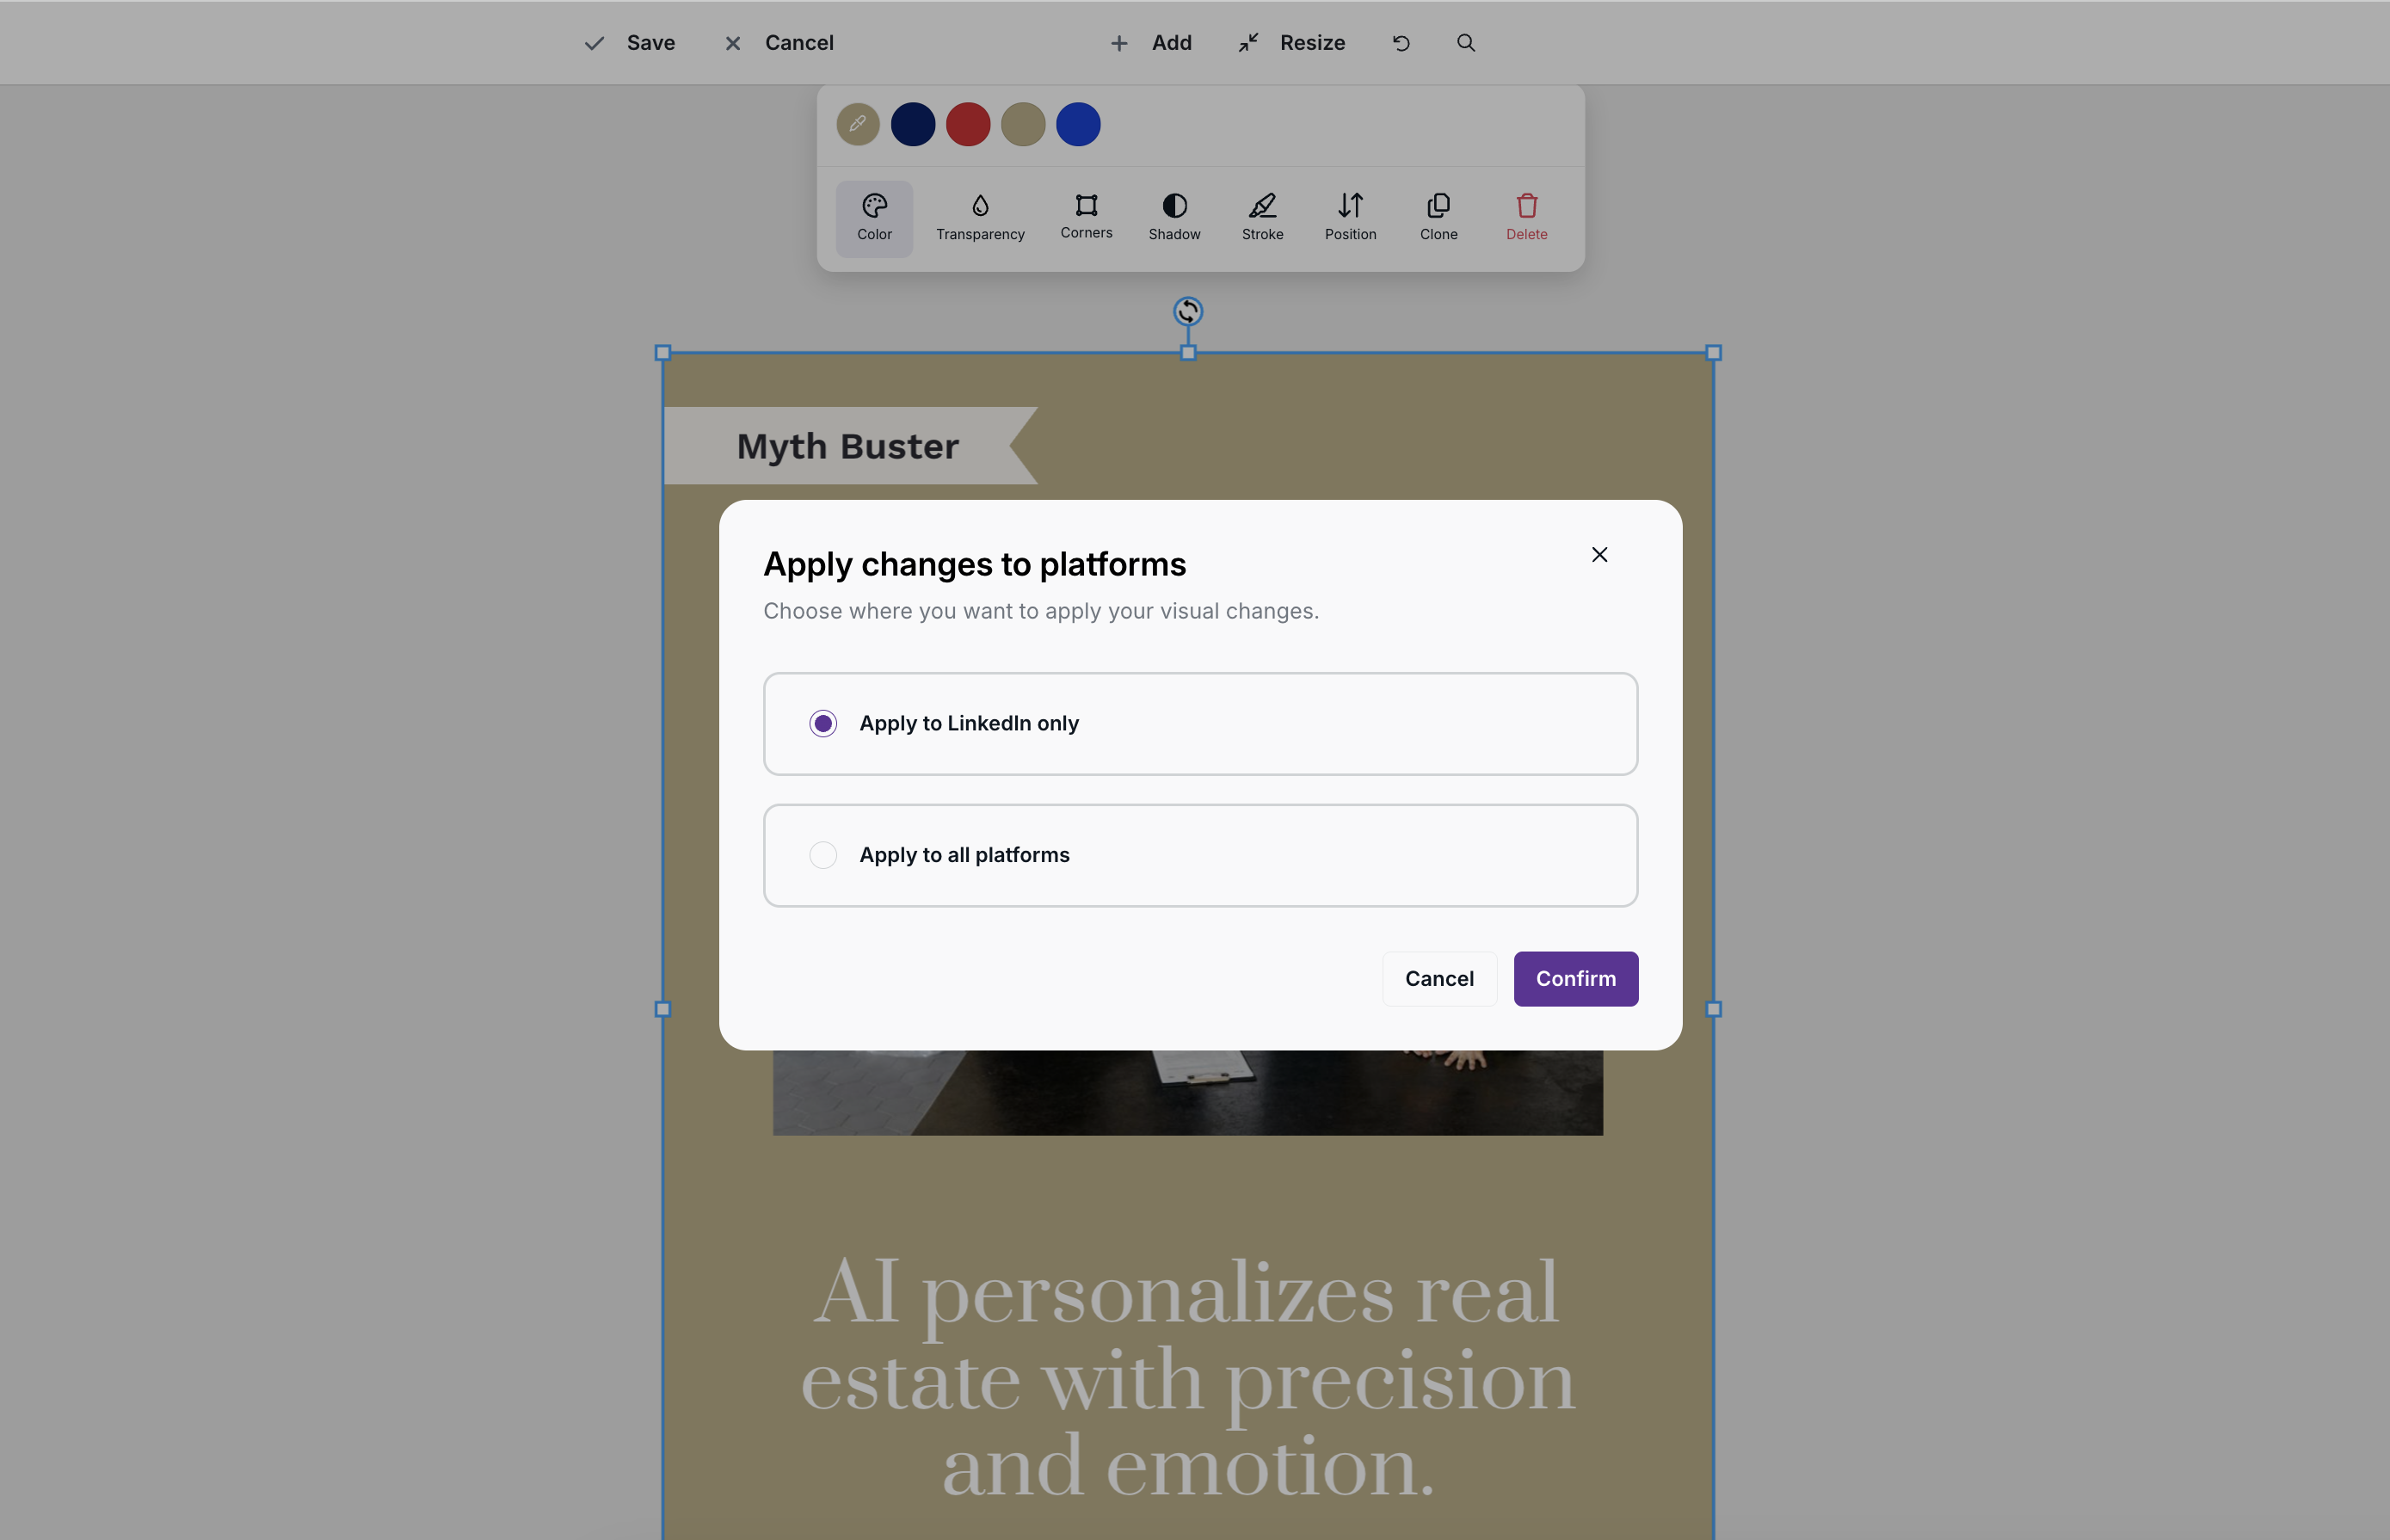
Select the desired option, then click Confirm.
If you decide not to keep the changes, click Cancel instead of Save while editing.
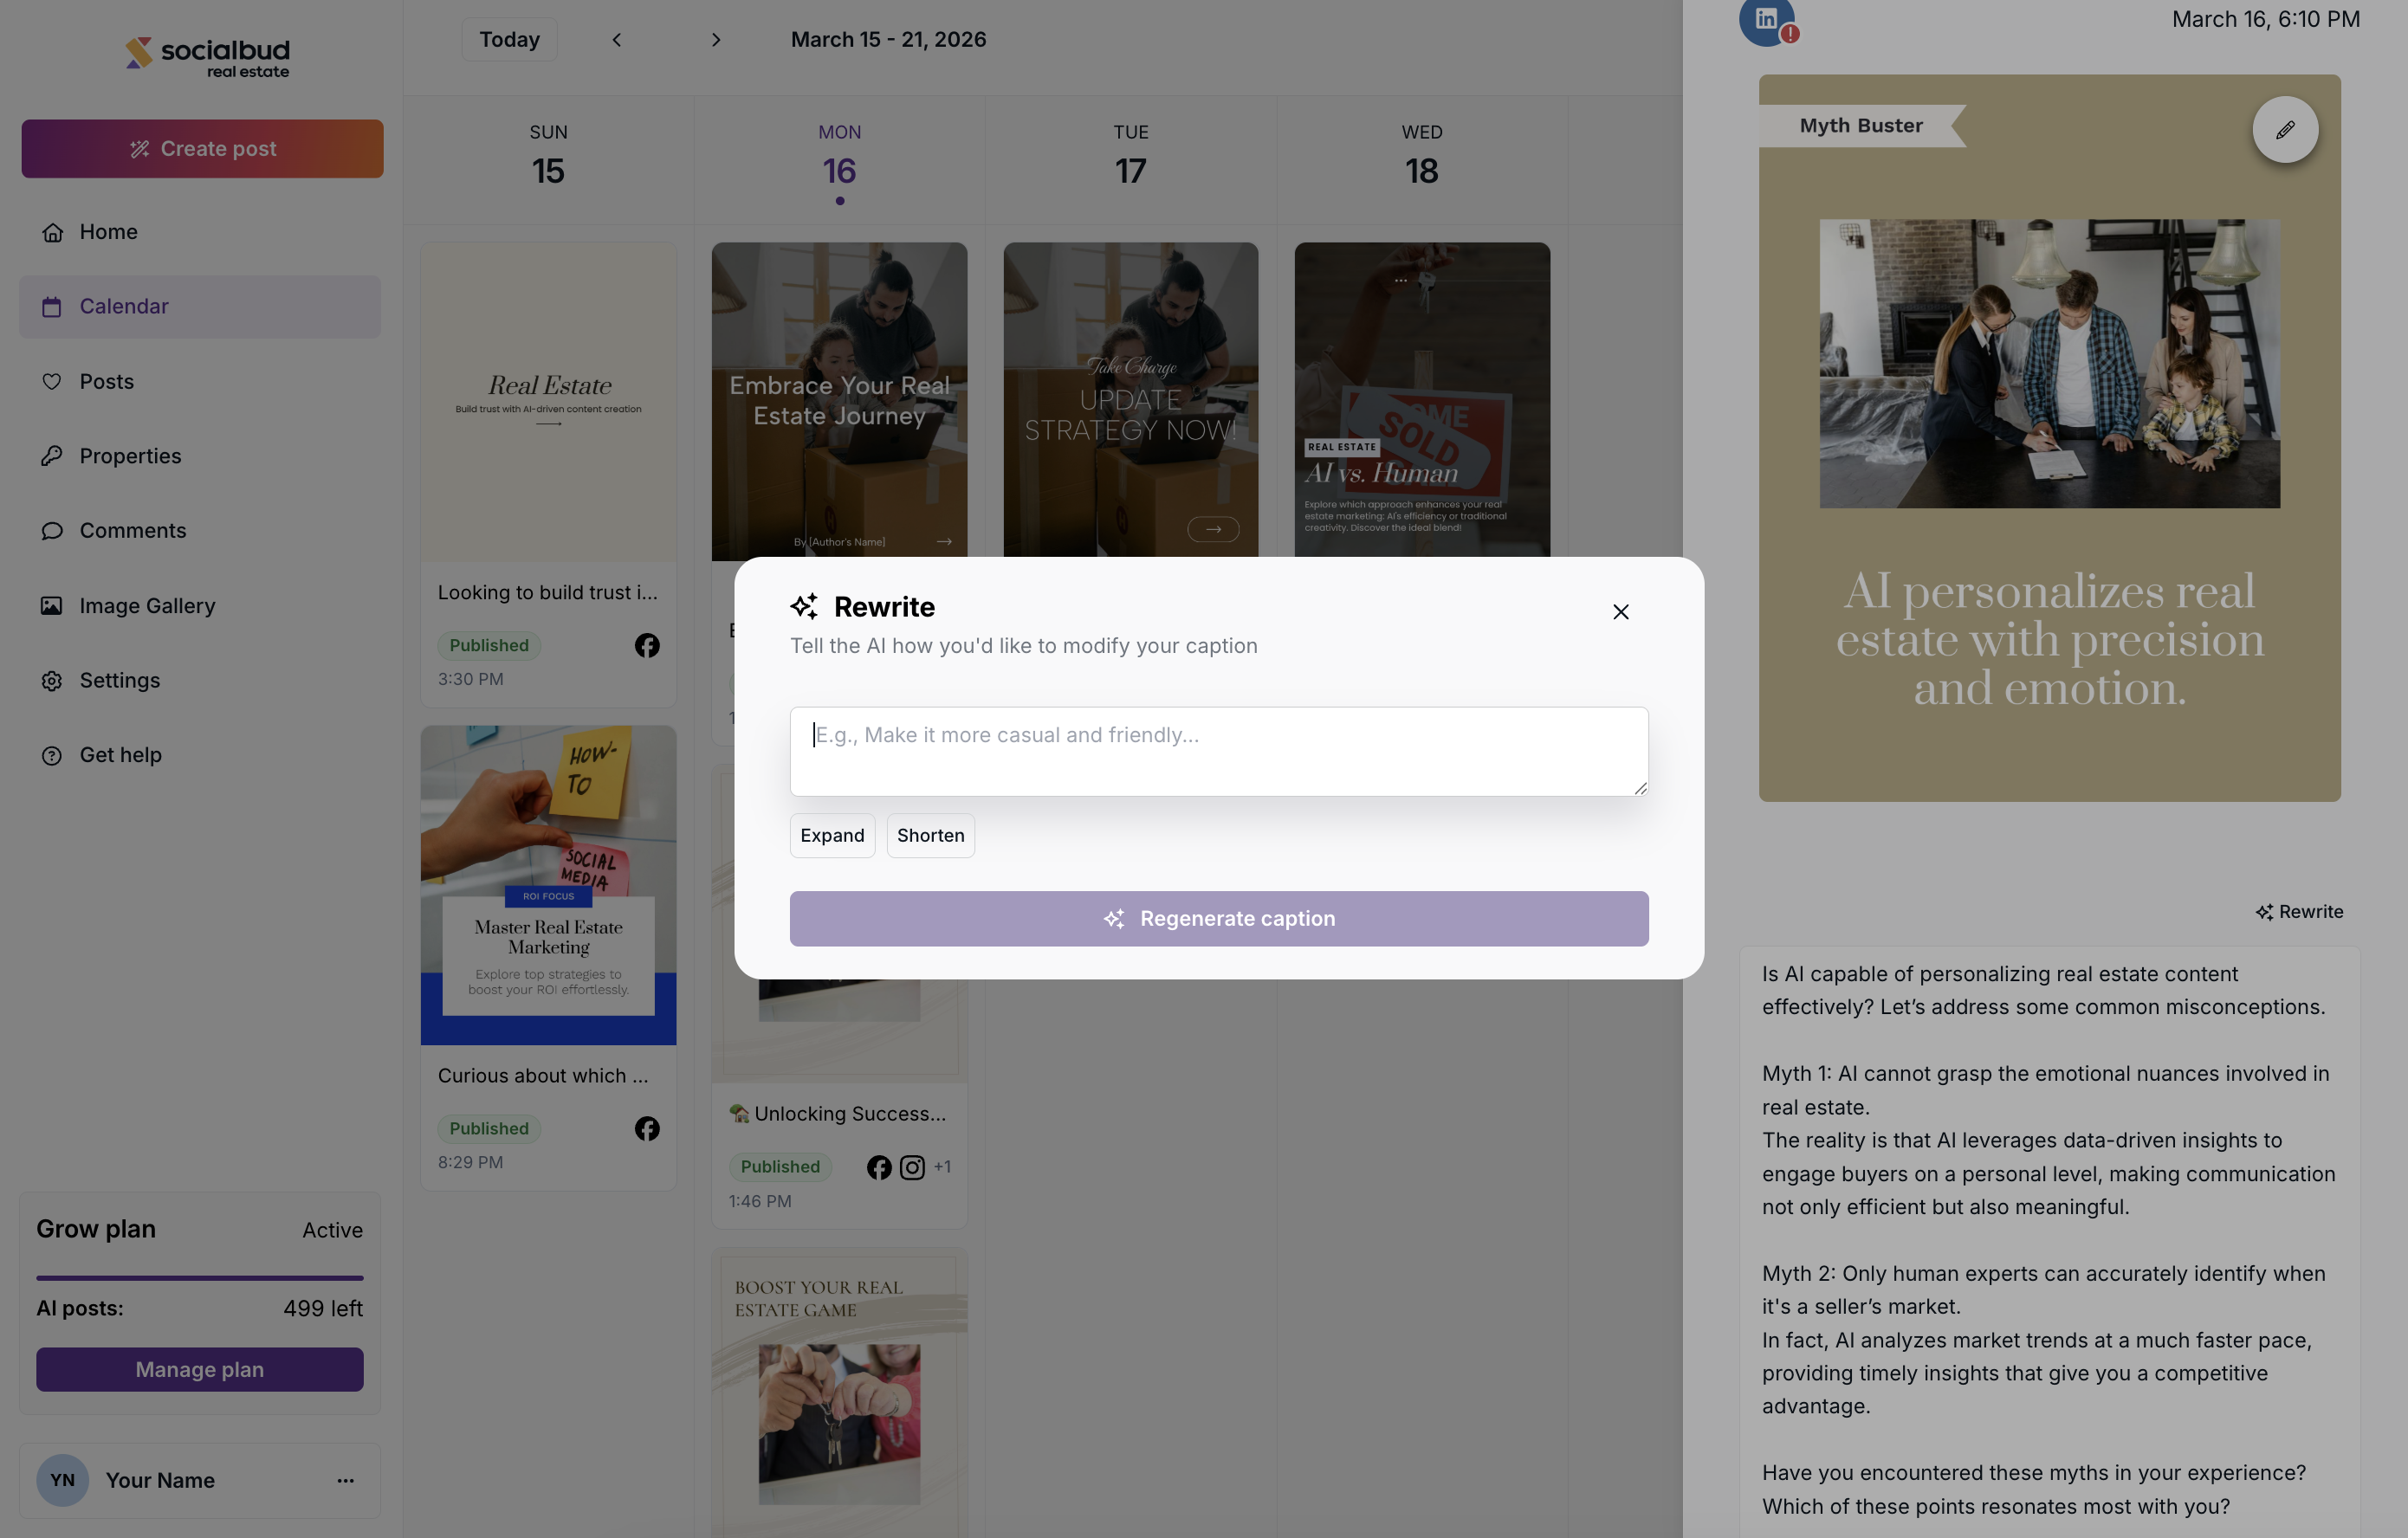
You can also change the caption using the Rewrite option inside the post drawer.
Click Rewrite, and a modal will open where you can enter instructions for the AI.
You can describe how you want the caption to change.
For example, you can ask the AI to:
change the tone
make the text shorter
make the text longer
rewrite the caption in a different style etc.
After generating a new version, you will see a preview of the updated caption.
You can then choose:
Use caption — to apply the new version
Cancel — to keep the original text
edit the prompt again and generate a new version
If you want to apply the new caption to every platform, scroll to the bottom of the drawer and click Apply to all platforms.
If you only want to save the caption for one platform, click:
Save for Facebook
Save for Instagram
Save for LinkedIn
or the selected platform button
If you do not want to keep the changes, click Cancel.
When publishing posts to Instagram, you may see a warning related to hashtags in your caption.
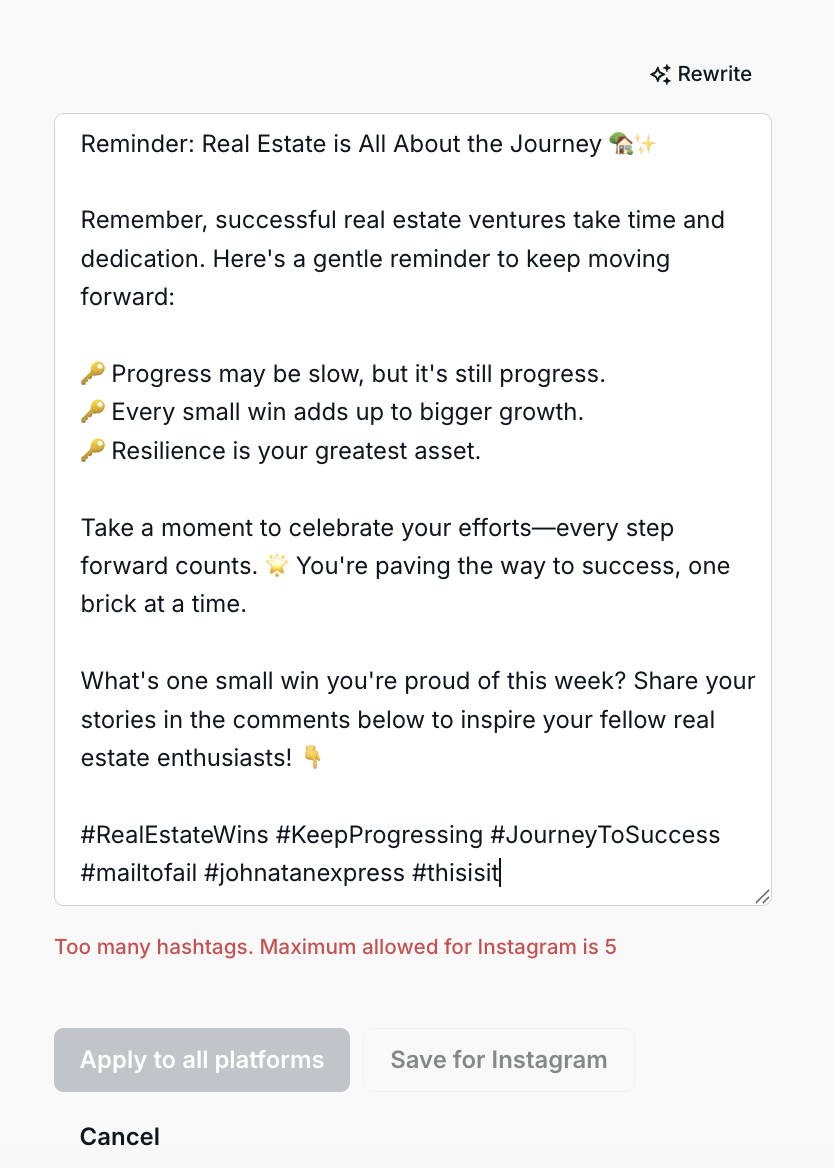
Instagram does not allow publishing posts through the API if the caption contains more than 5 hashtags.
If you see a warning during publishing:
Reduce the number of hashtags in your caption
Make sure your post contains no more than 5 hashtags
Try publishing again
If your post includes more hashtags, you can:
Keep the most relevant 5 in the caption
Add additional hashtags later manually in the comments (optional)
When you create a post, it may be scheduled for multiple social media platforms. The icons of the platforms where the post is scheduled are displayed on the post's card.
However, in some cases, you might want to reschedule a post for just one specific platform to a different time or date. In this situation, the post will appear as two separate posts in your calendar.
Read more about rescheduling posts in the section below or in the following article: